In this guide I will explain how to set up the 365 portal to allow searching and exporting users PST archives.
Assign the sufficient roles to do it
![](https://marcoschiavon.net/wp-content/uploads/2023/07/Screenshot_2023-07-28_at_10_23_30-scaled.jpg)
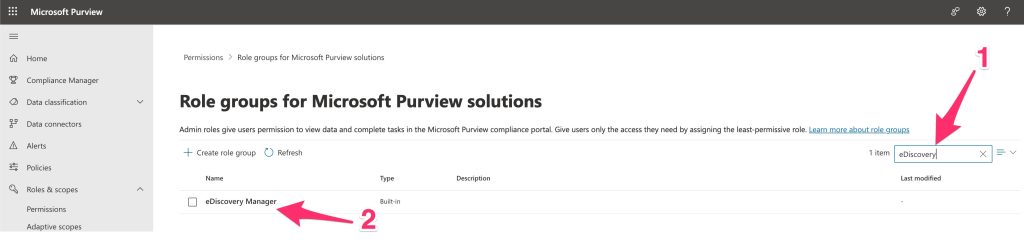
Filter for eDiscovery Manager
![](https://marcoschiavon.net/wp-content/uploads/2023/07/Screenshot_2023-07-28_at_10_25_51-1024x243.jpg)
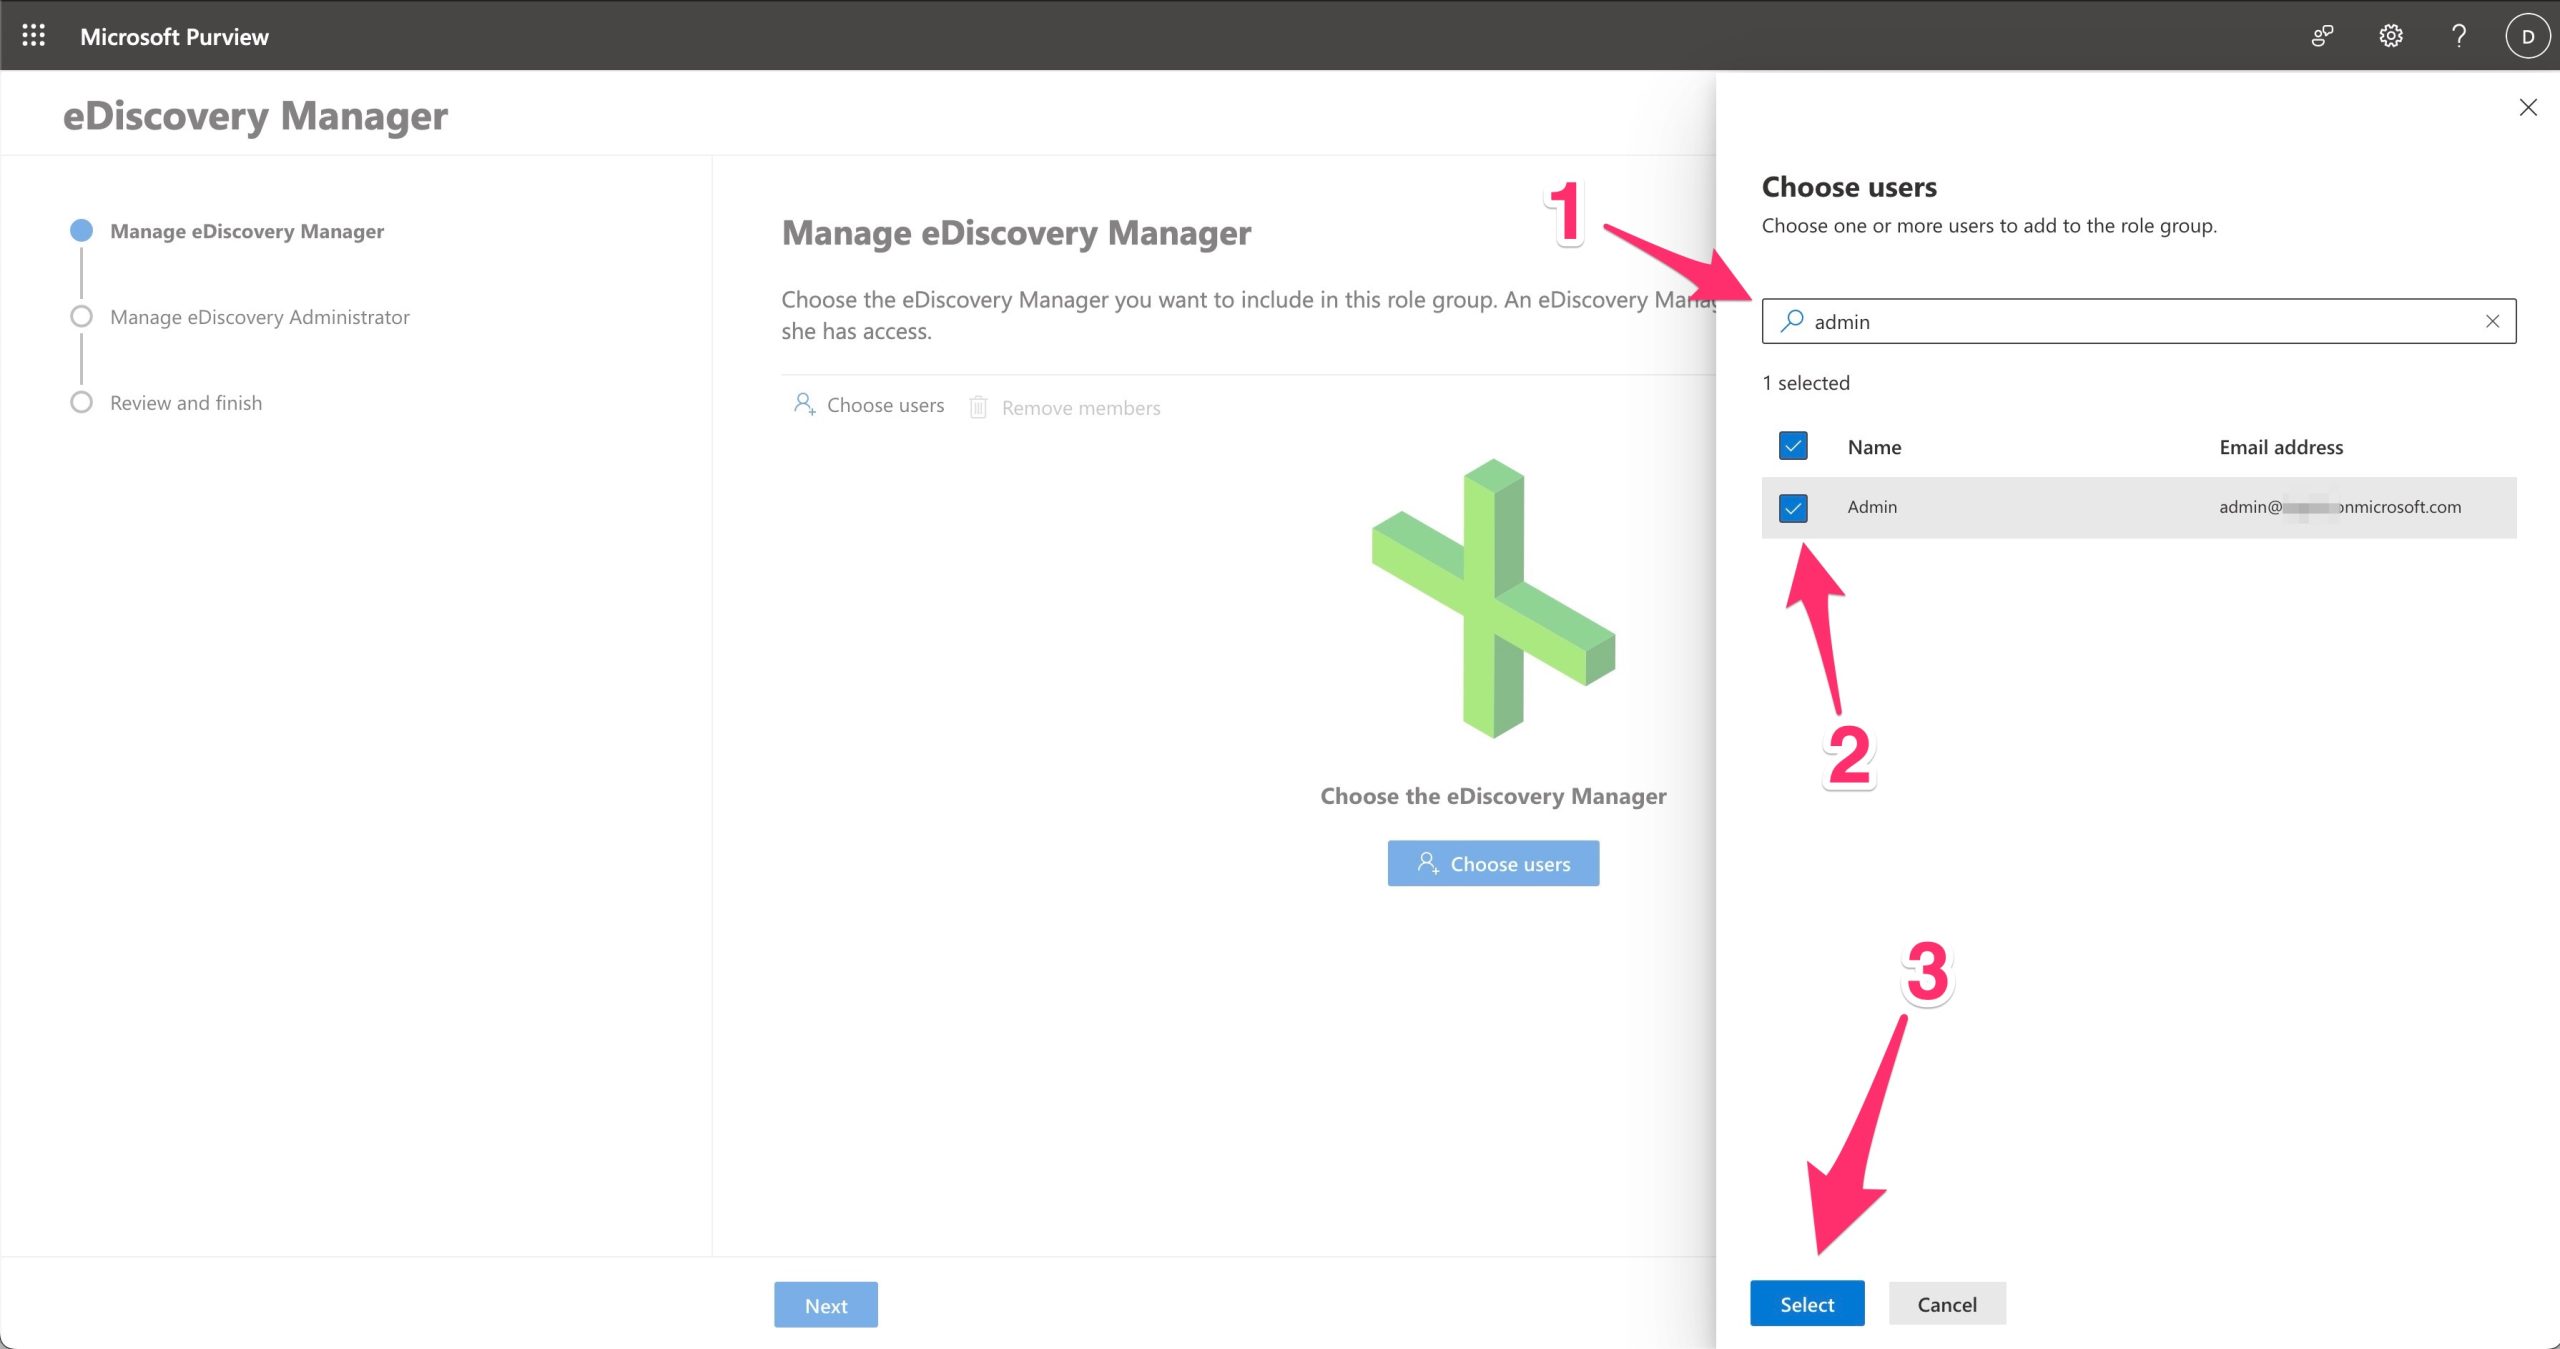
Click on it and fallow the wizard
![](https://marcoschiavon.net/wp-content/uploads/2023/07/Screenshot_2023-07-28_at_10_49_10-scaled.jpg)
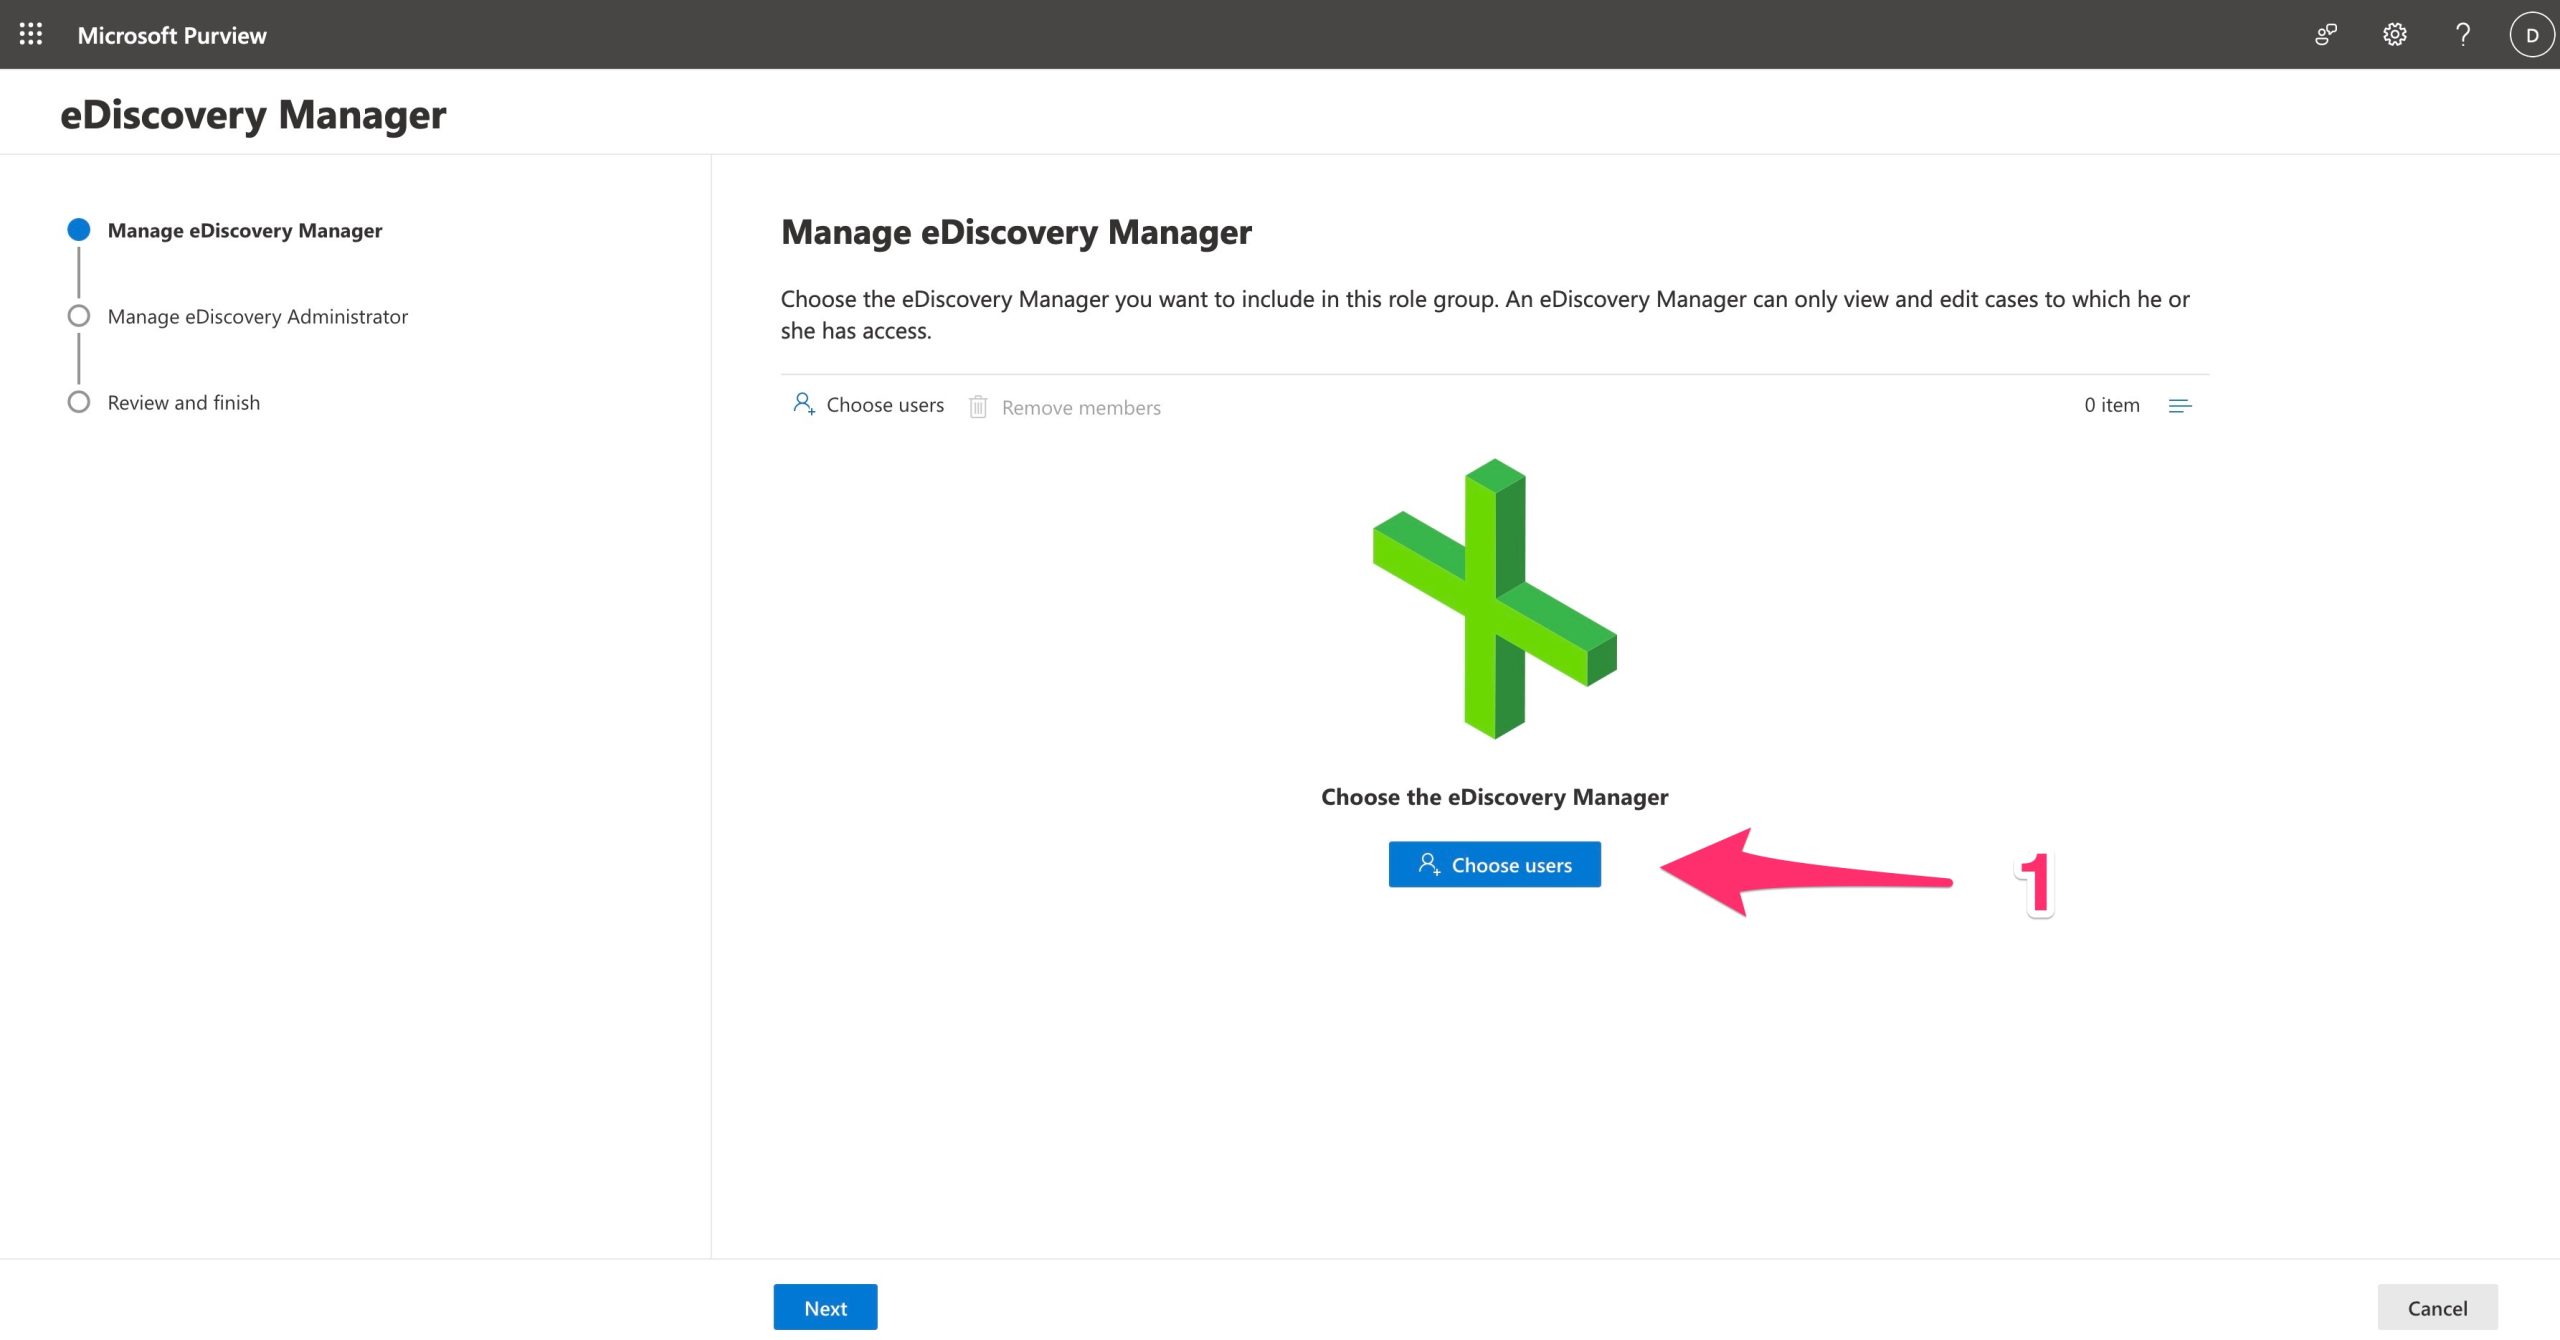
Choose the eDiscovery Manager you want to include in this role group. An eDiscovery Manager can only view and edit cases to which he or she has access.
![](https://marcoschiavon.net/wp-content/uploads/2023/07/Screenshot_2023-07-28_at_10_51_37-scaled.jpg)
Choose the eDiscovery Administrator you want to include in this role group. An eDiscovery Administrator can view and edit all cases regardless of permissions.
![](https://marcoschiavon.net/wp-content/uploads/2023/07/Screenshot_2023-07-28_at_10_56_26-1024x535.jpg)
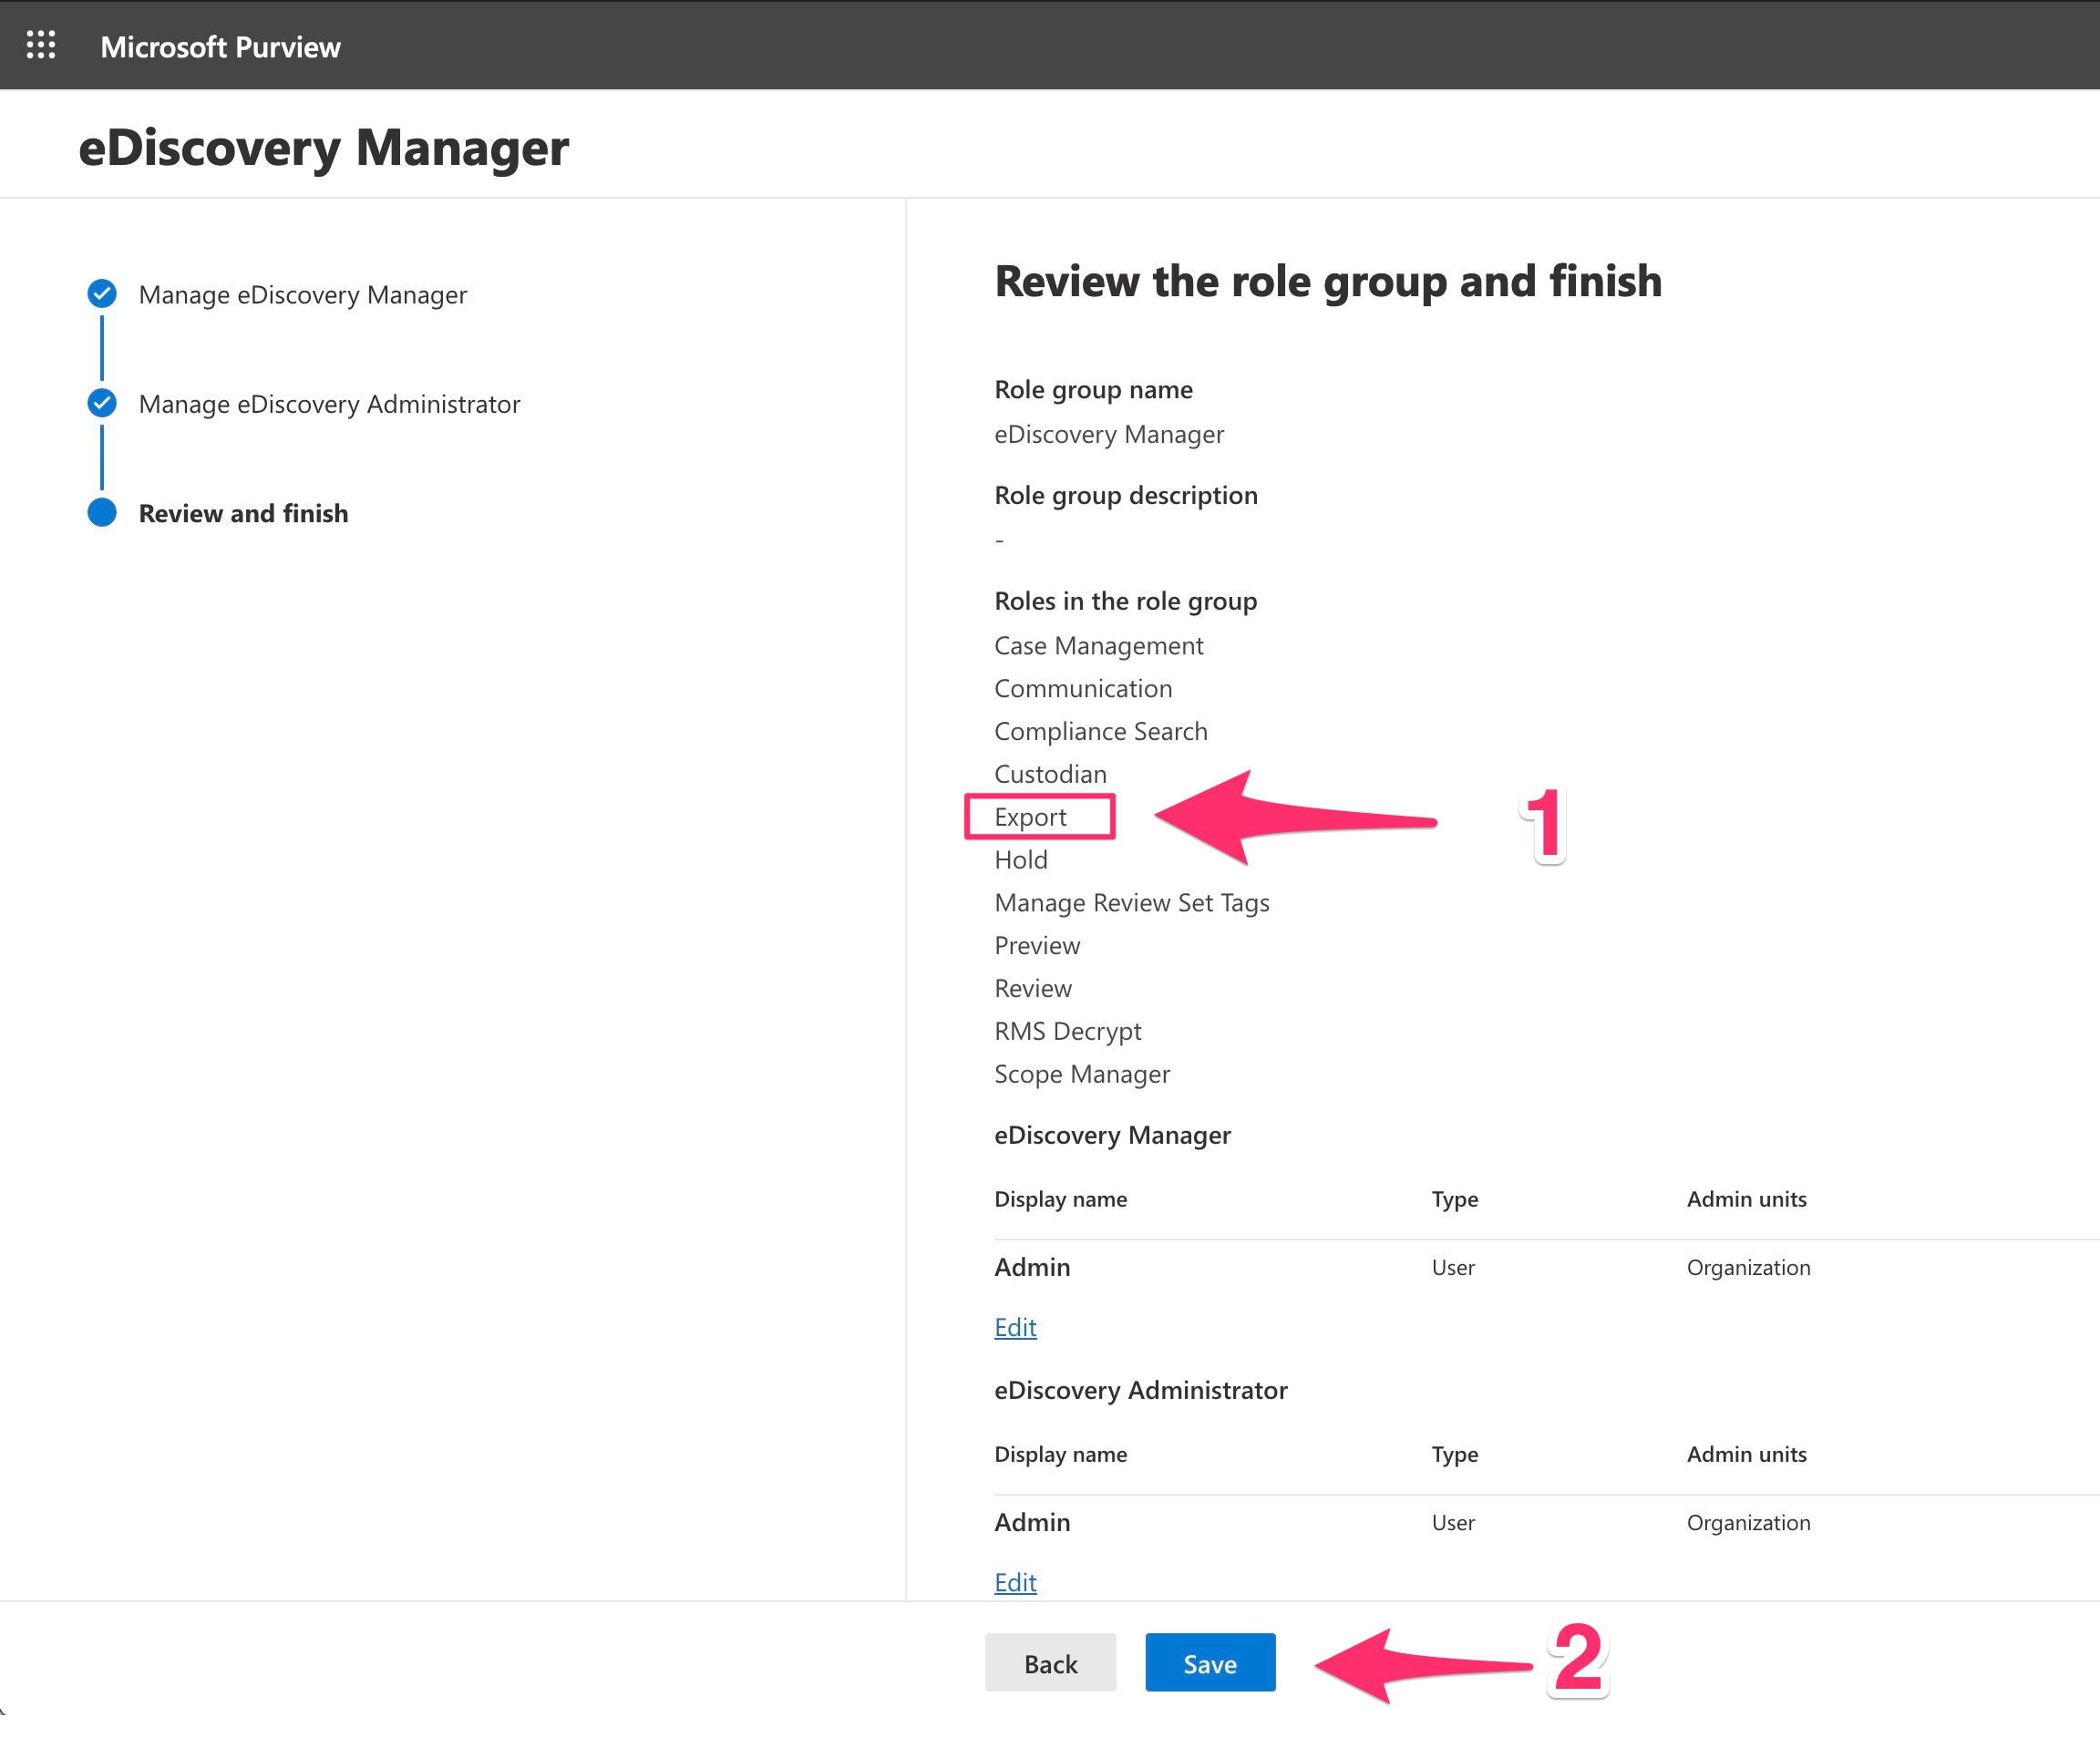
Verify that there is the “export” role
![](https://marcoschiavon.net/wp-content/uploads/2023/07/Screenshot_2023-07-28_at_11_00_04.jpg)
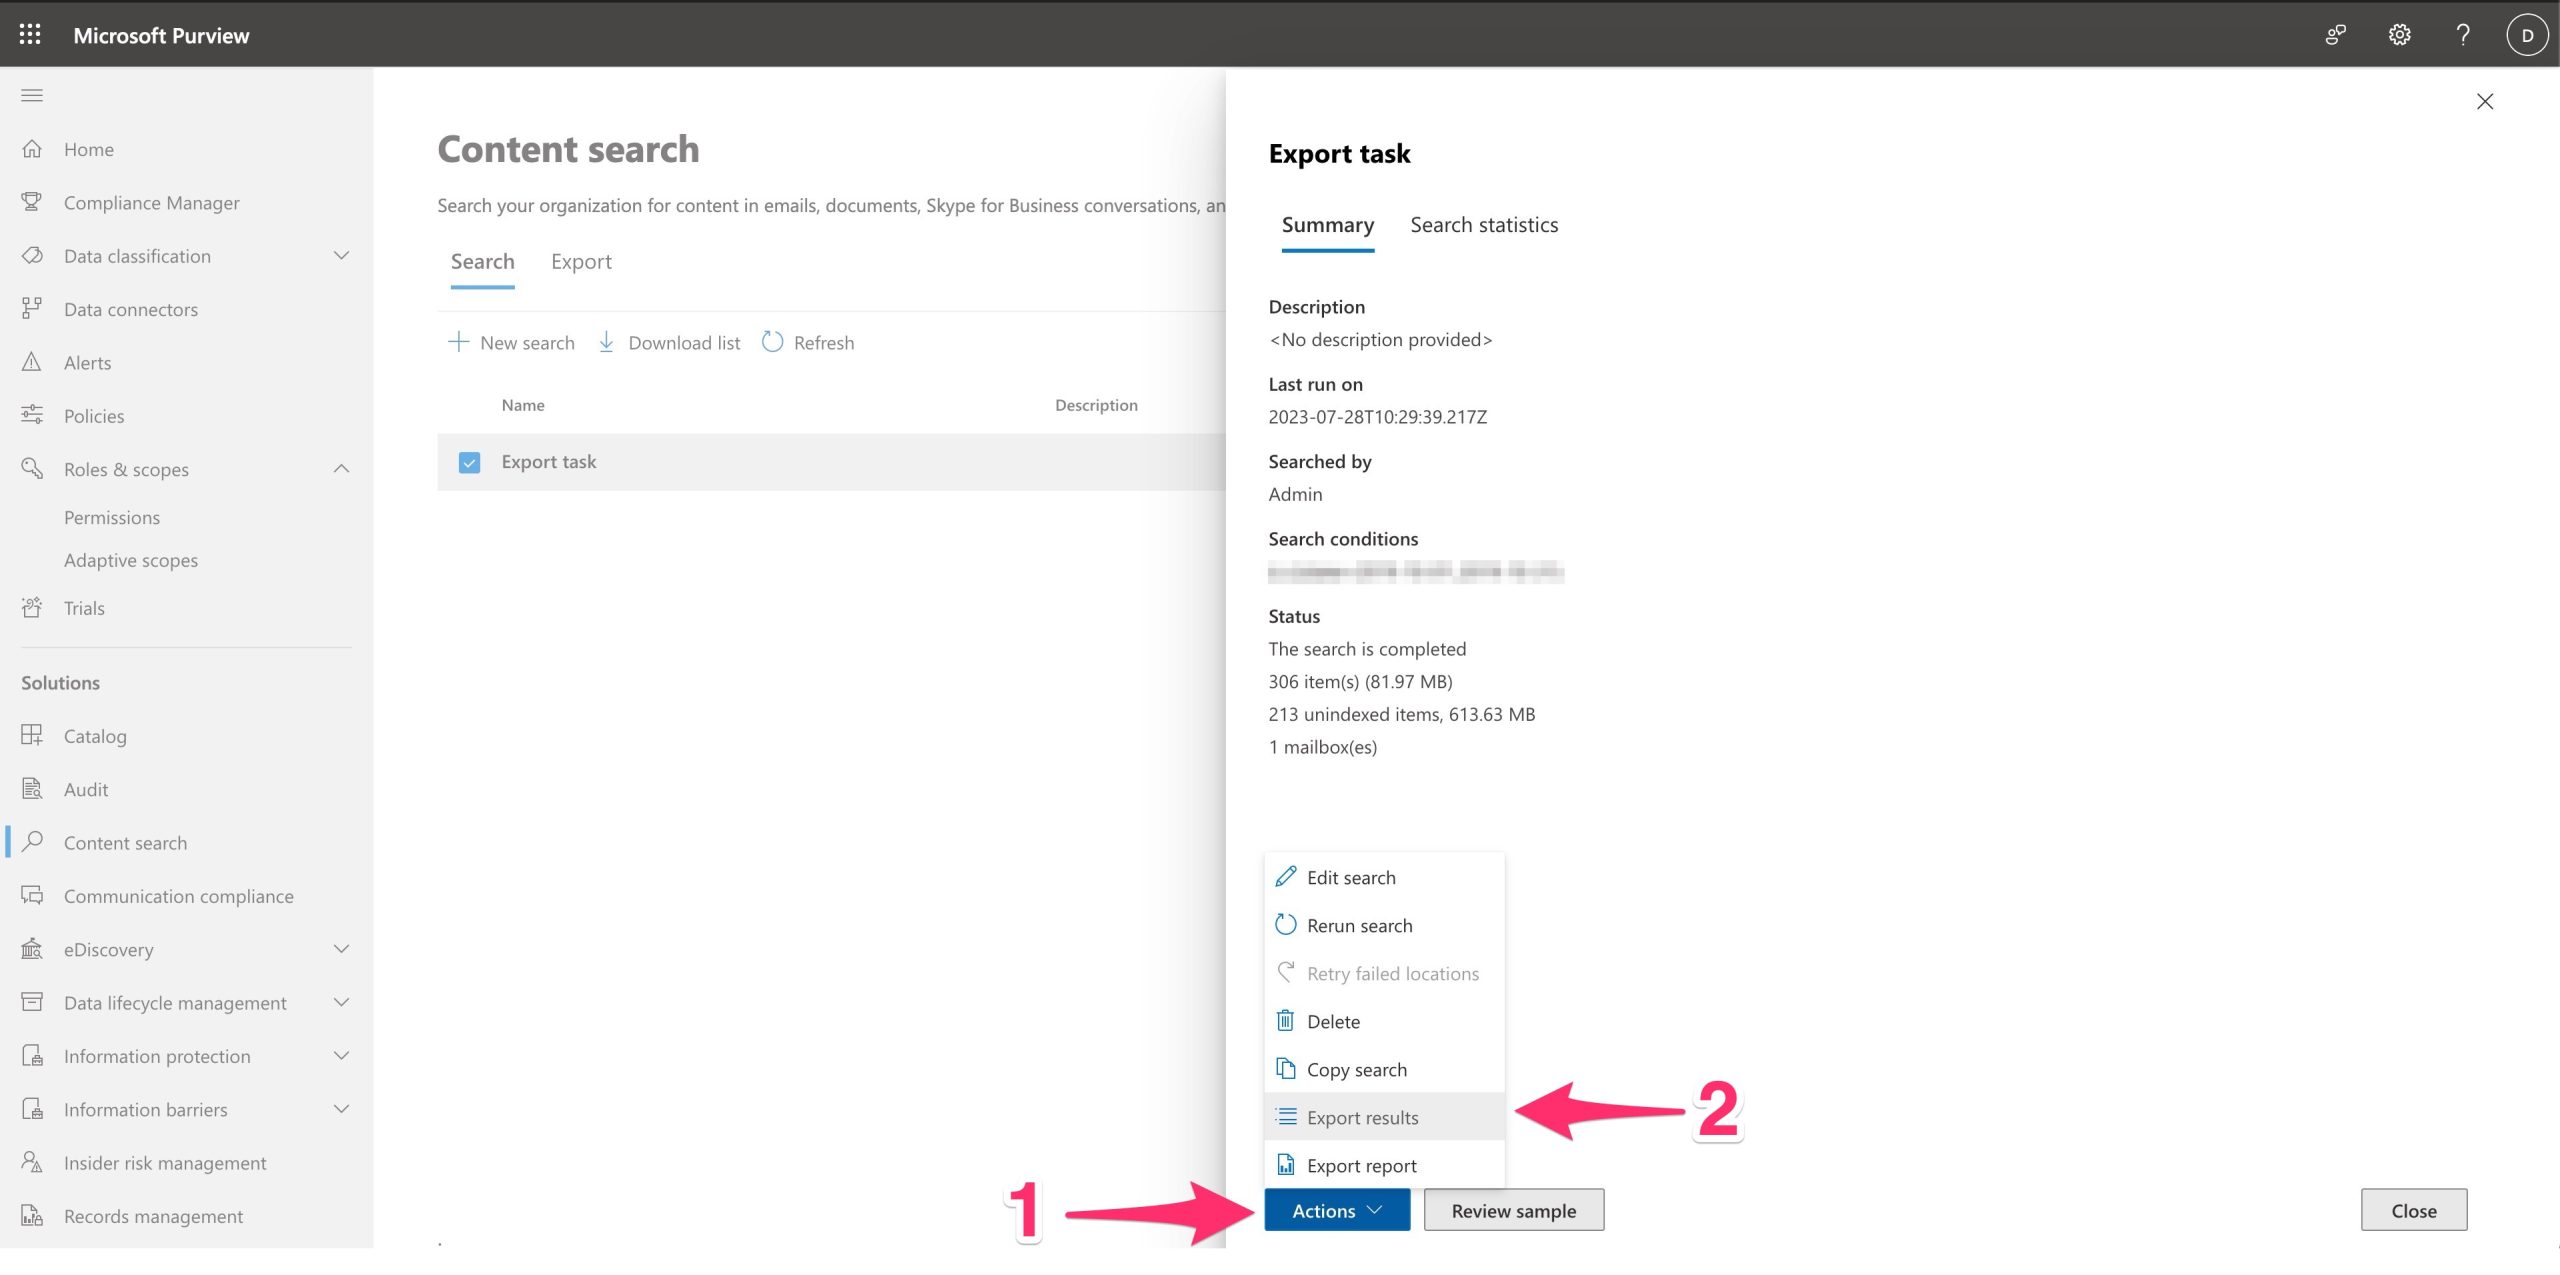
Now you are ready to proceed with a “search task” that is fallowed with exportation .
Login with the user that you assigned the role (the previous steps) and go to Microsoft Purview and select Content search
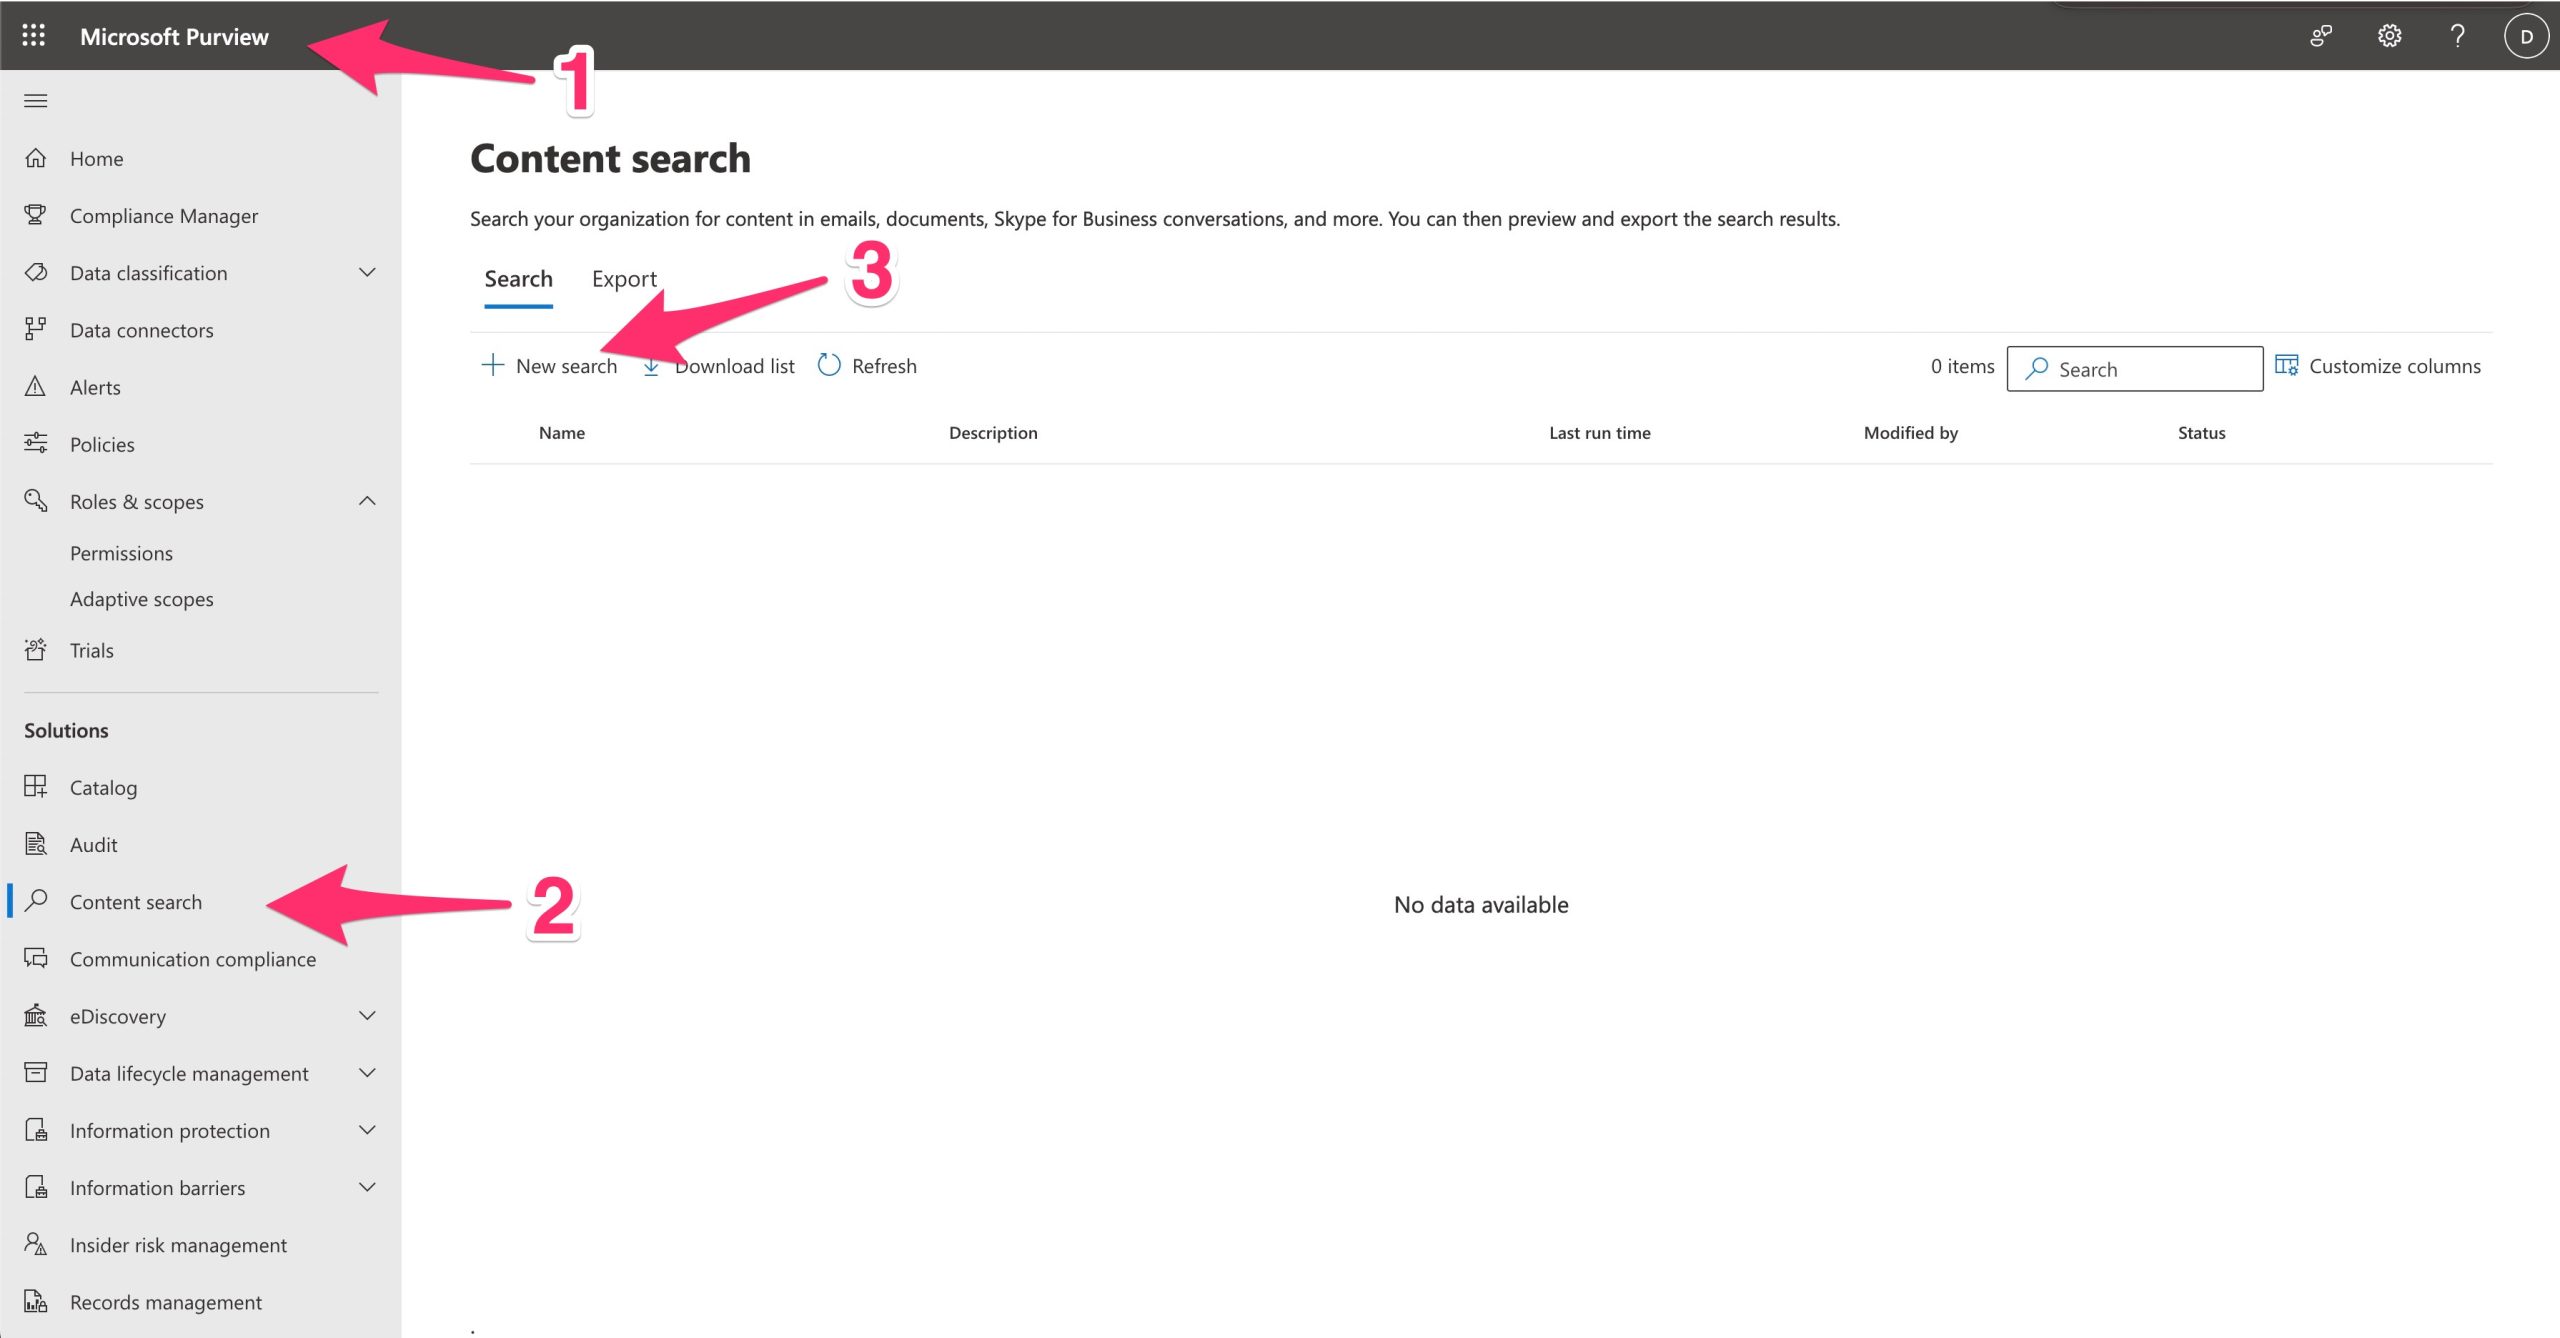
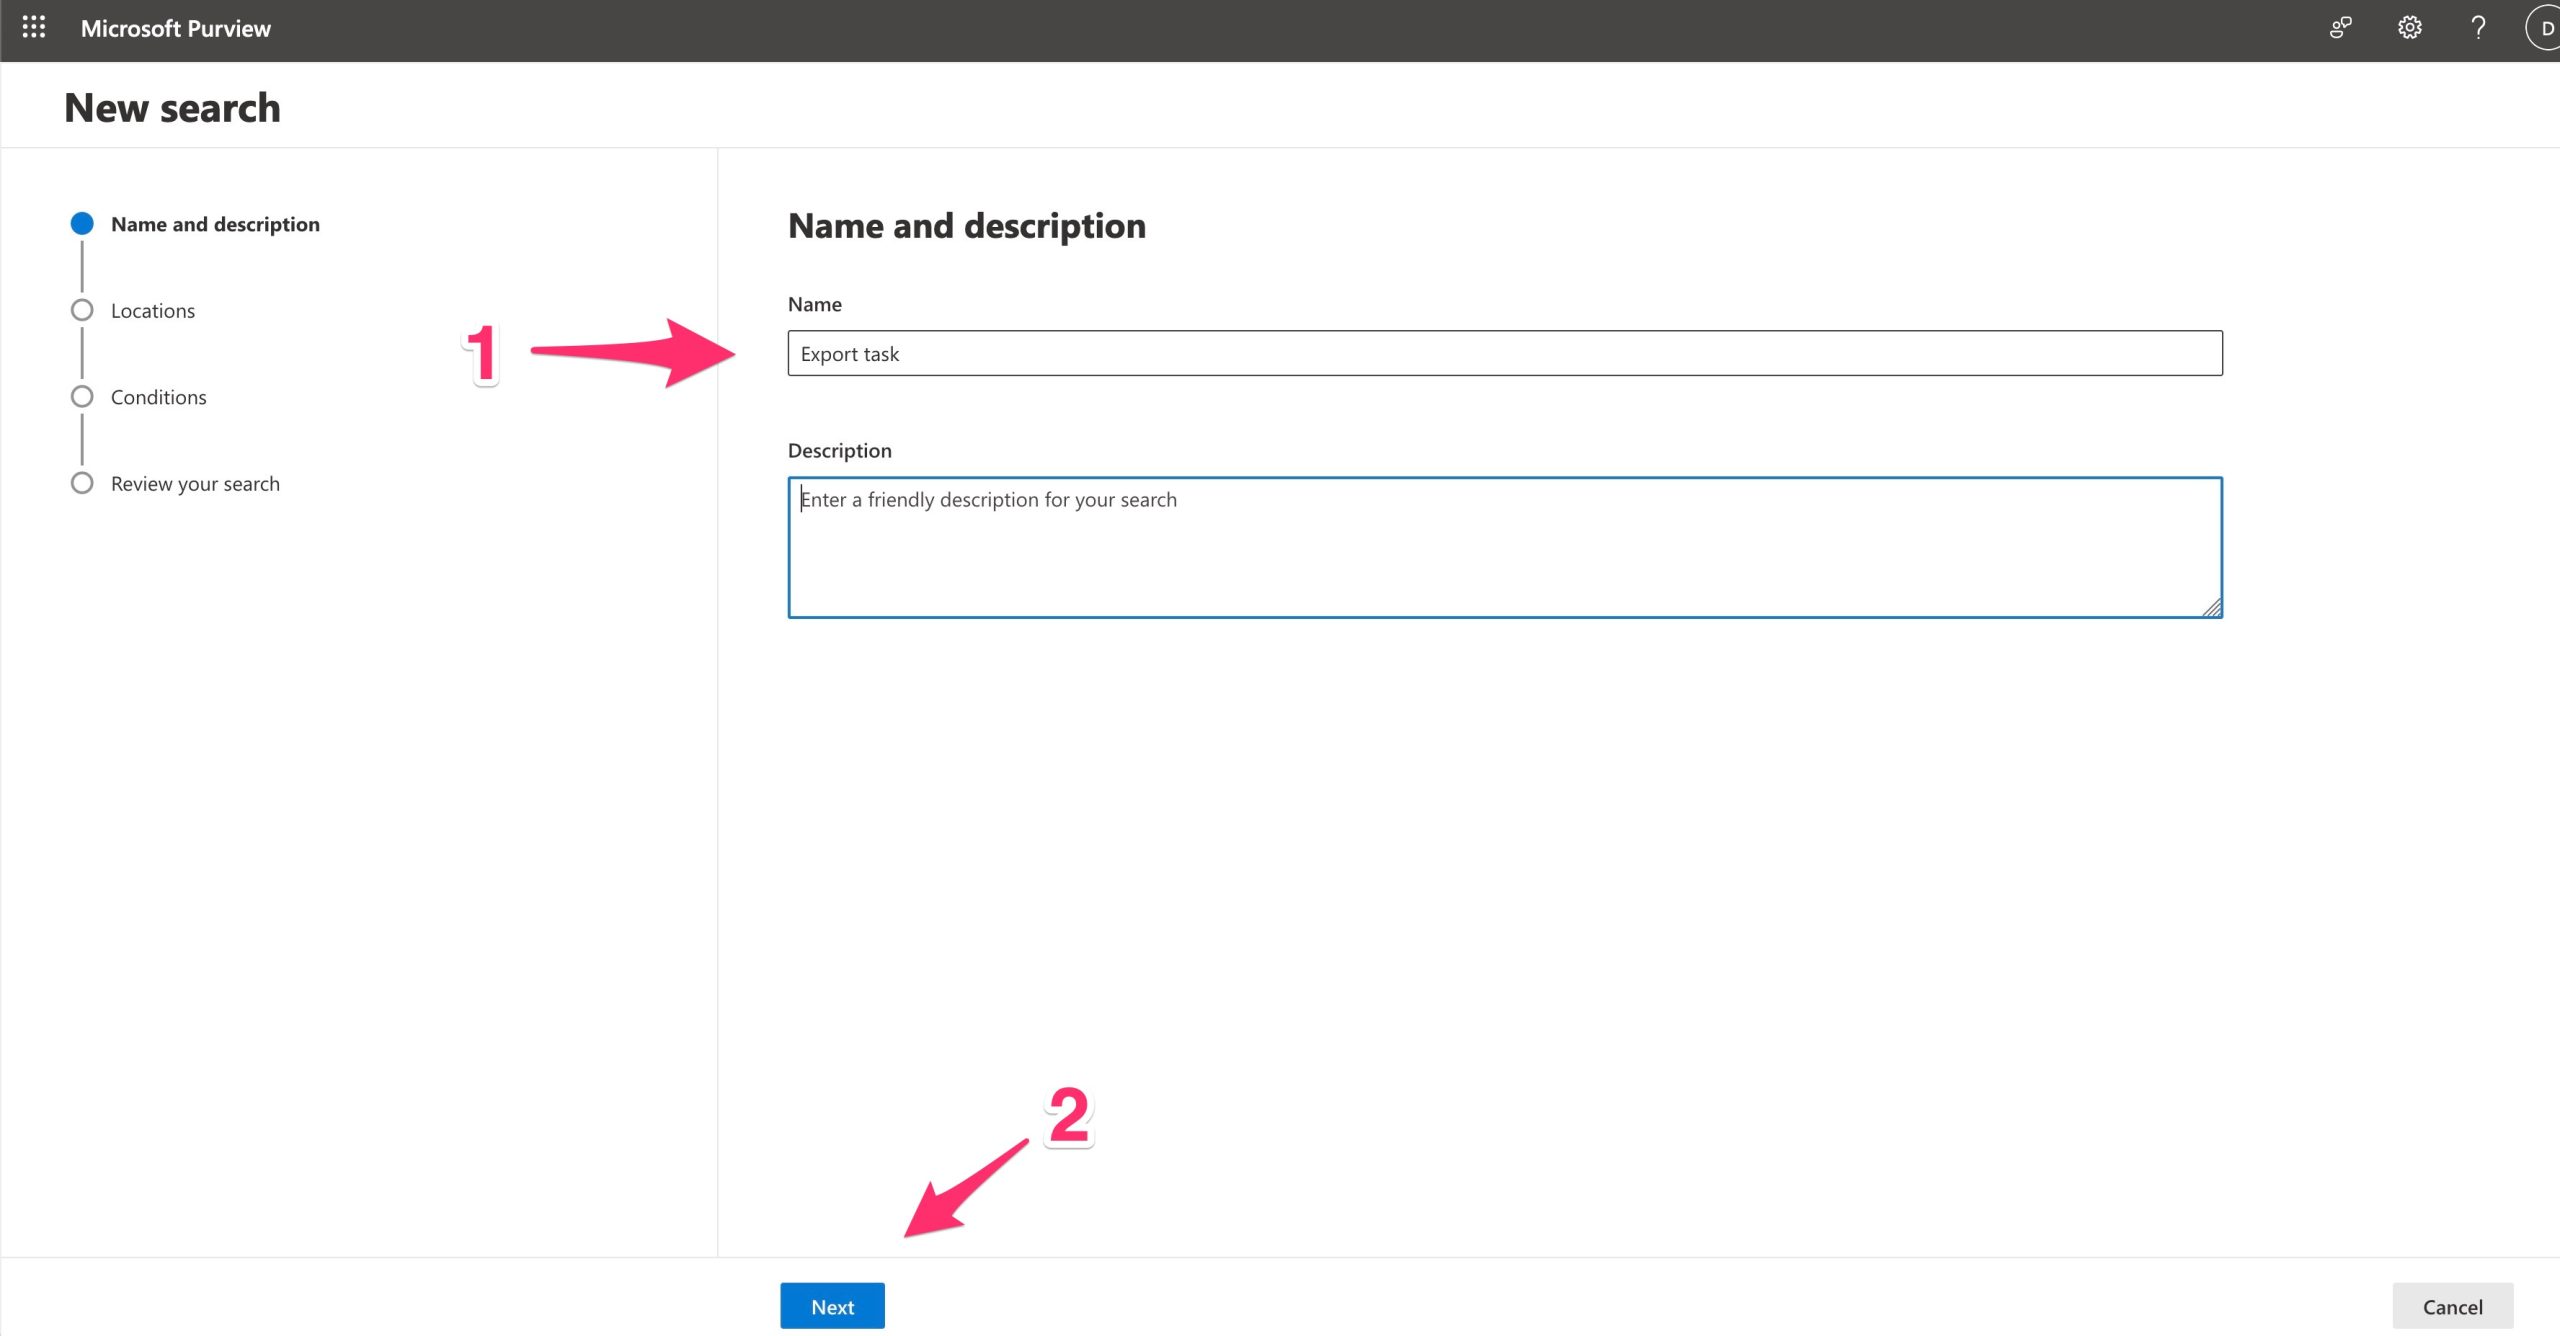
![](https://marcoschiavon.net/wp-content/uploads/2023/07/Screenshot_2023-07-28_at_11_06_14-scaled.jpg)
Select “New Search”
![](https://marcoschiavon.net/wp-content/uploads/2023/07/Screenshot_2023-07-28_at_11_09_52-scaled.jpg)
![](https://marcoschiavon.net/wp-content/uploads/2023/07/Screenshot_2023-07-28_at_12_14_58-scaled.jpg)
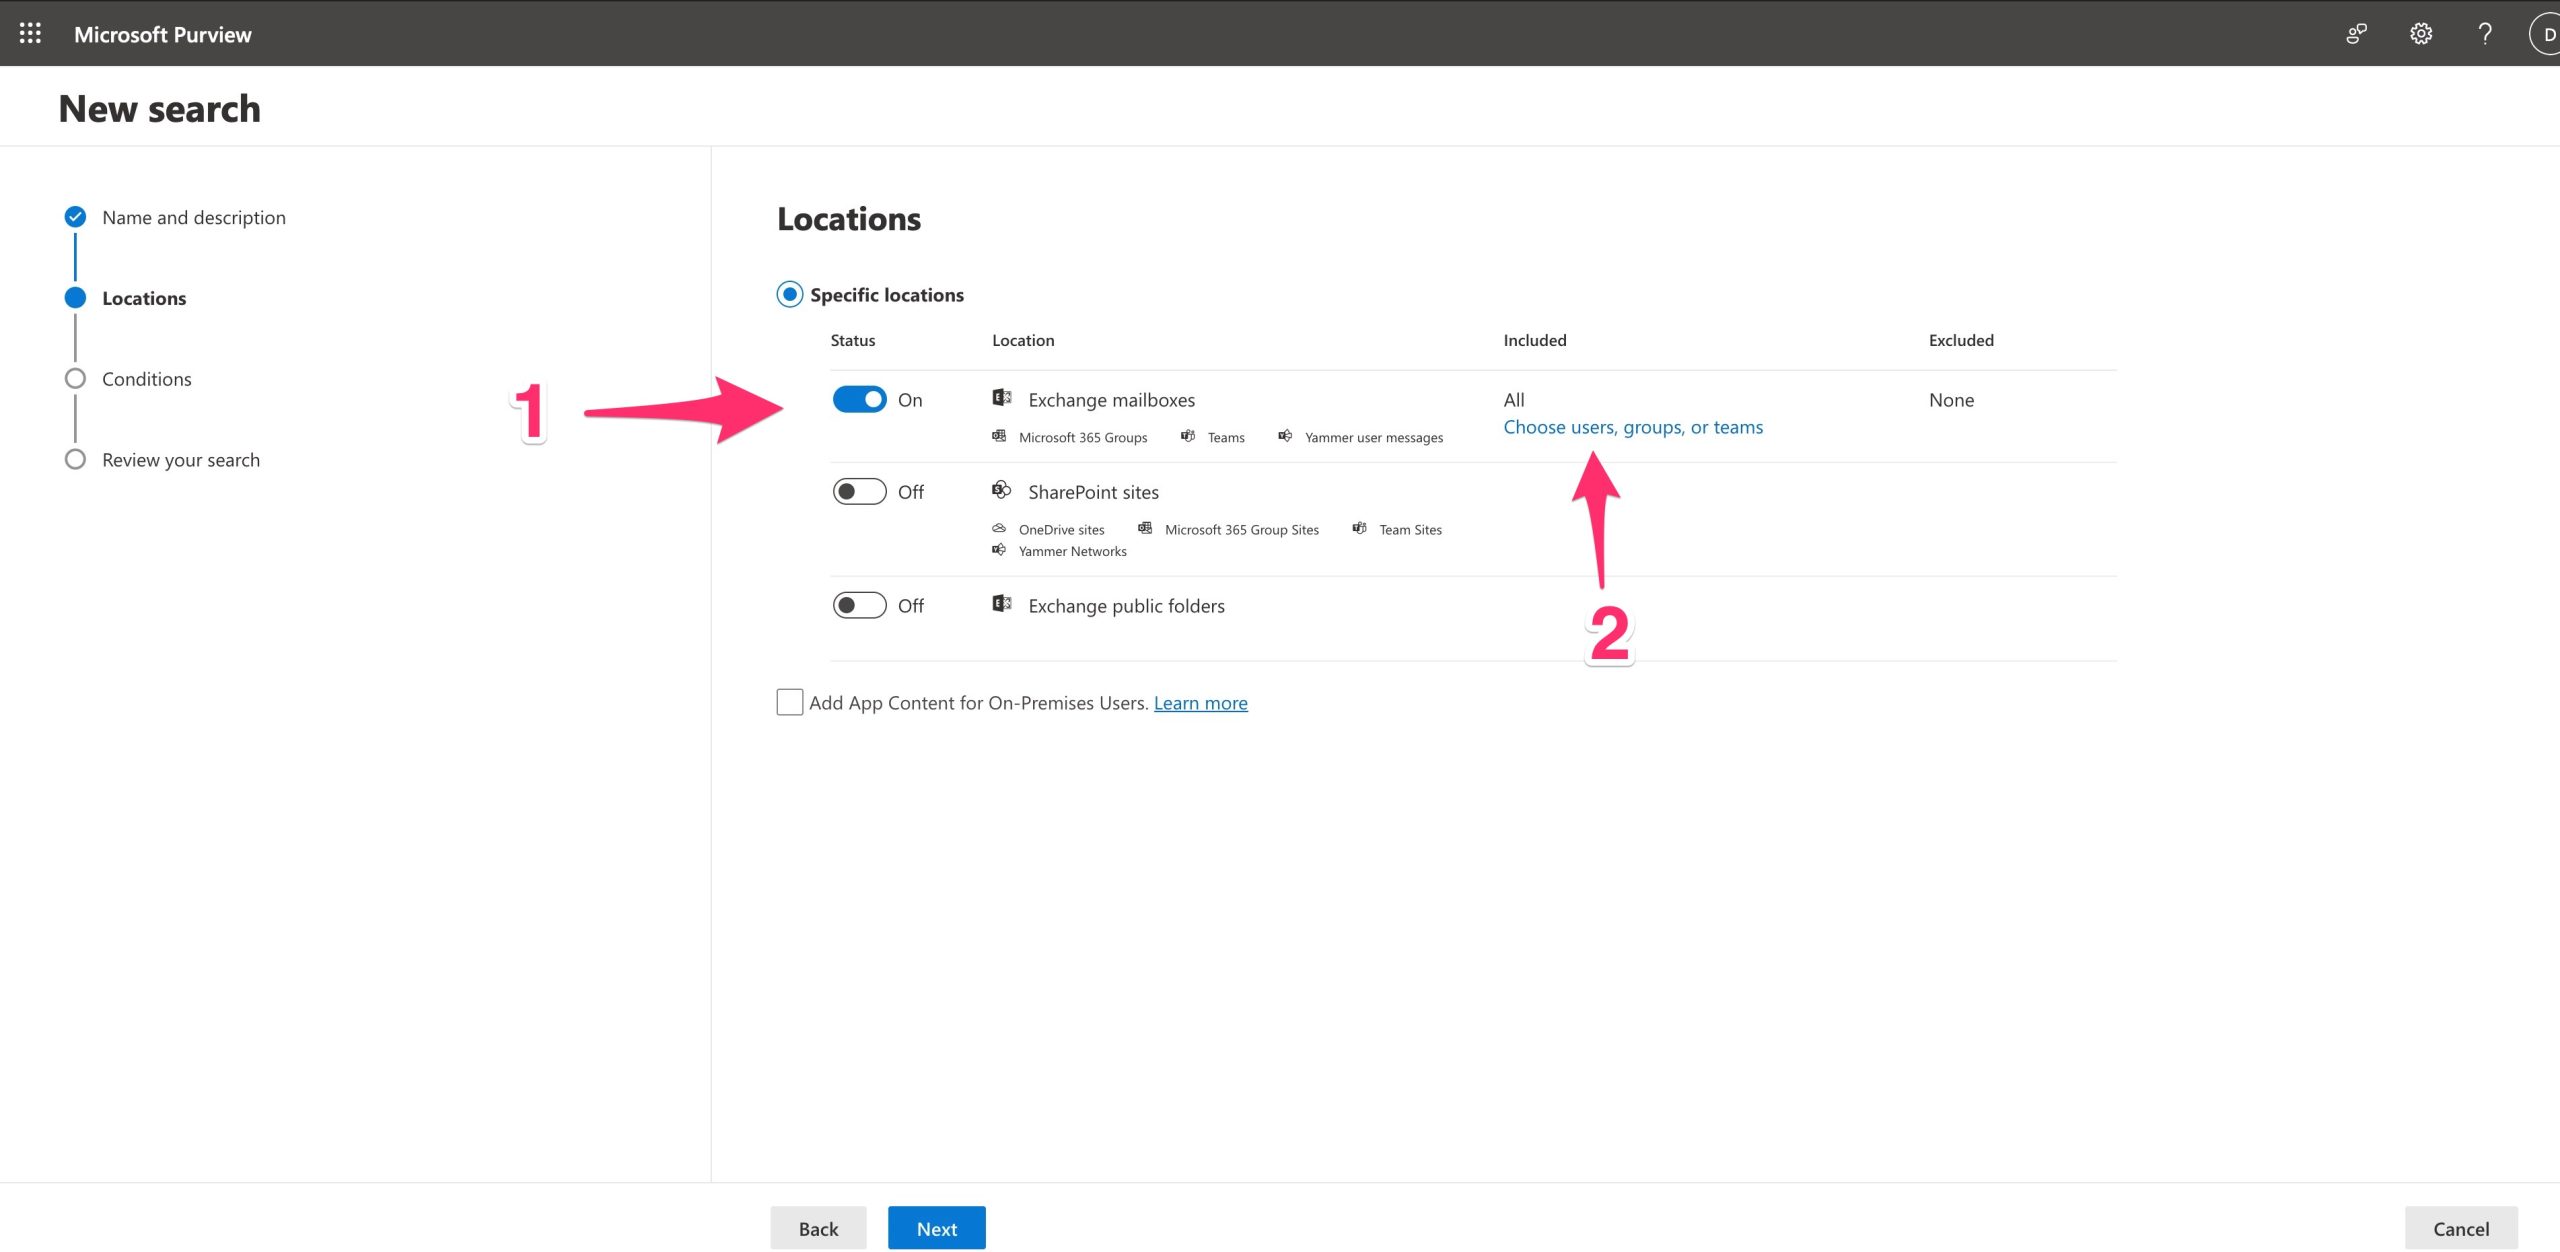
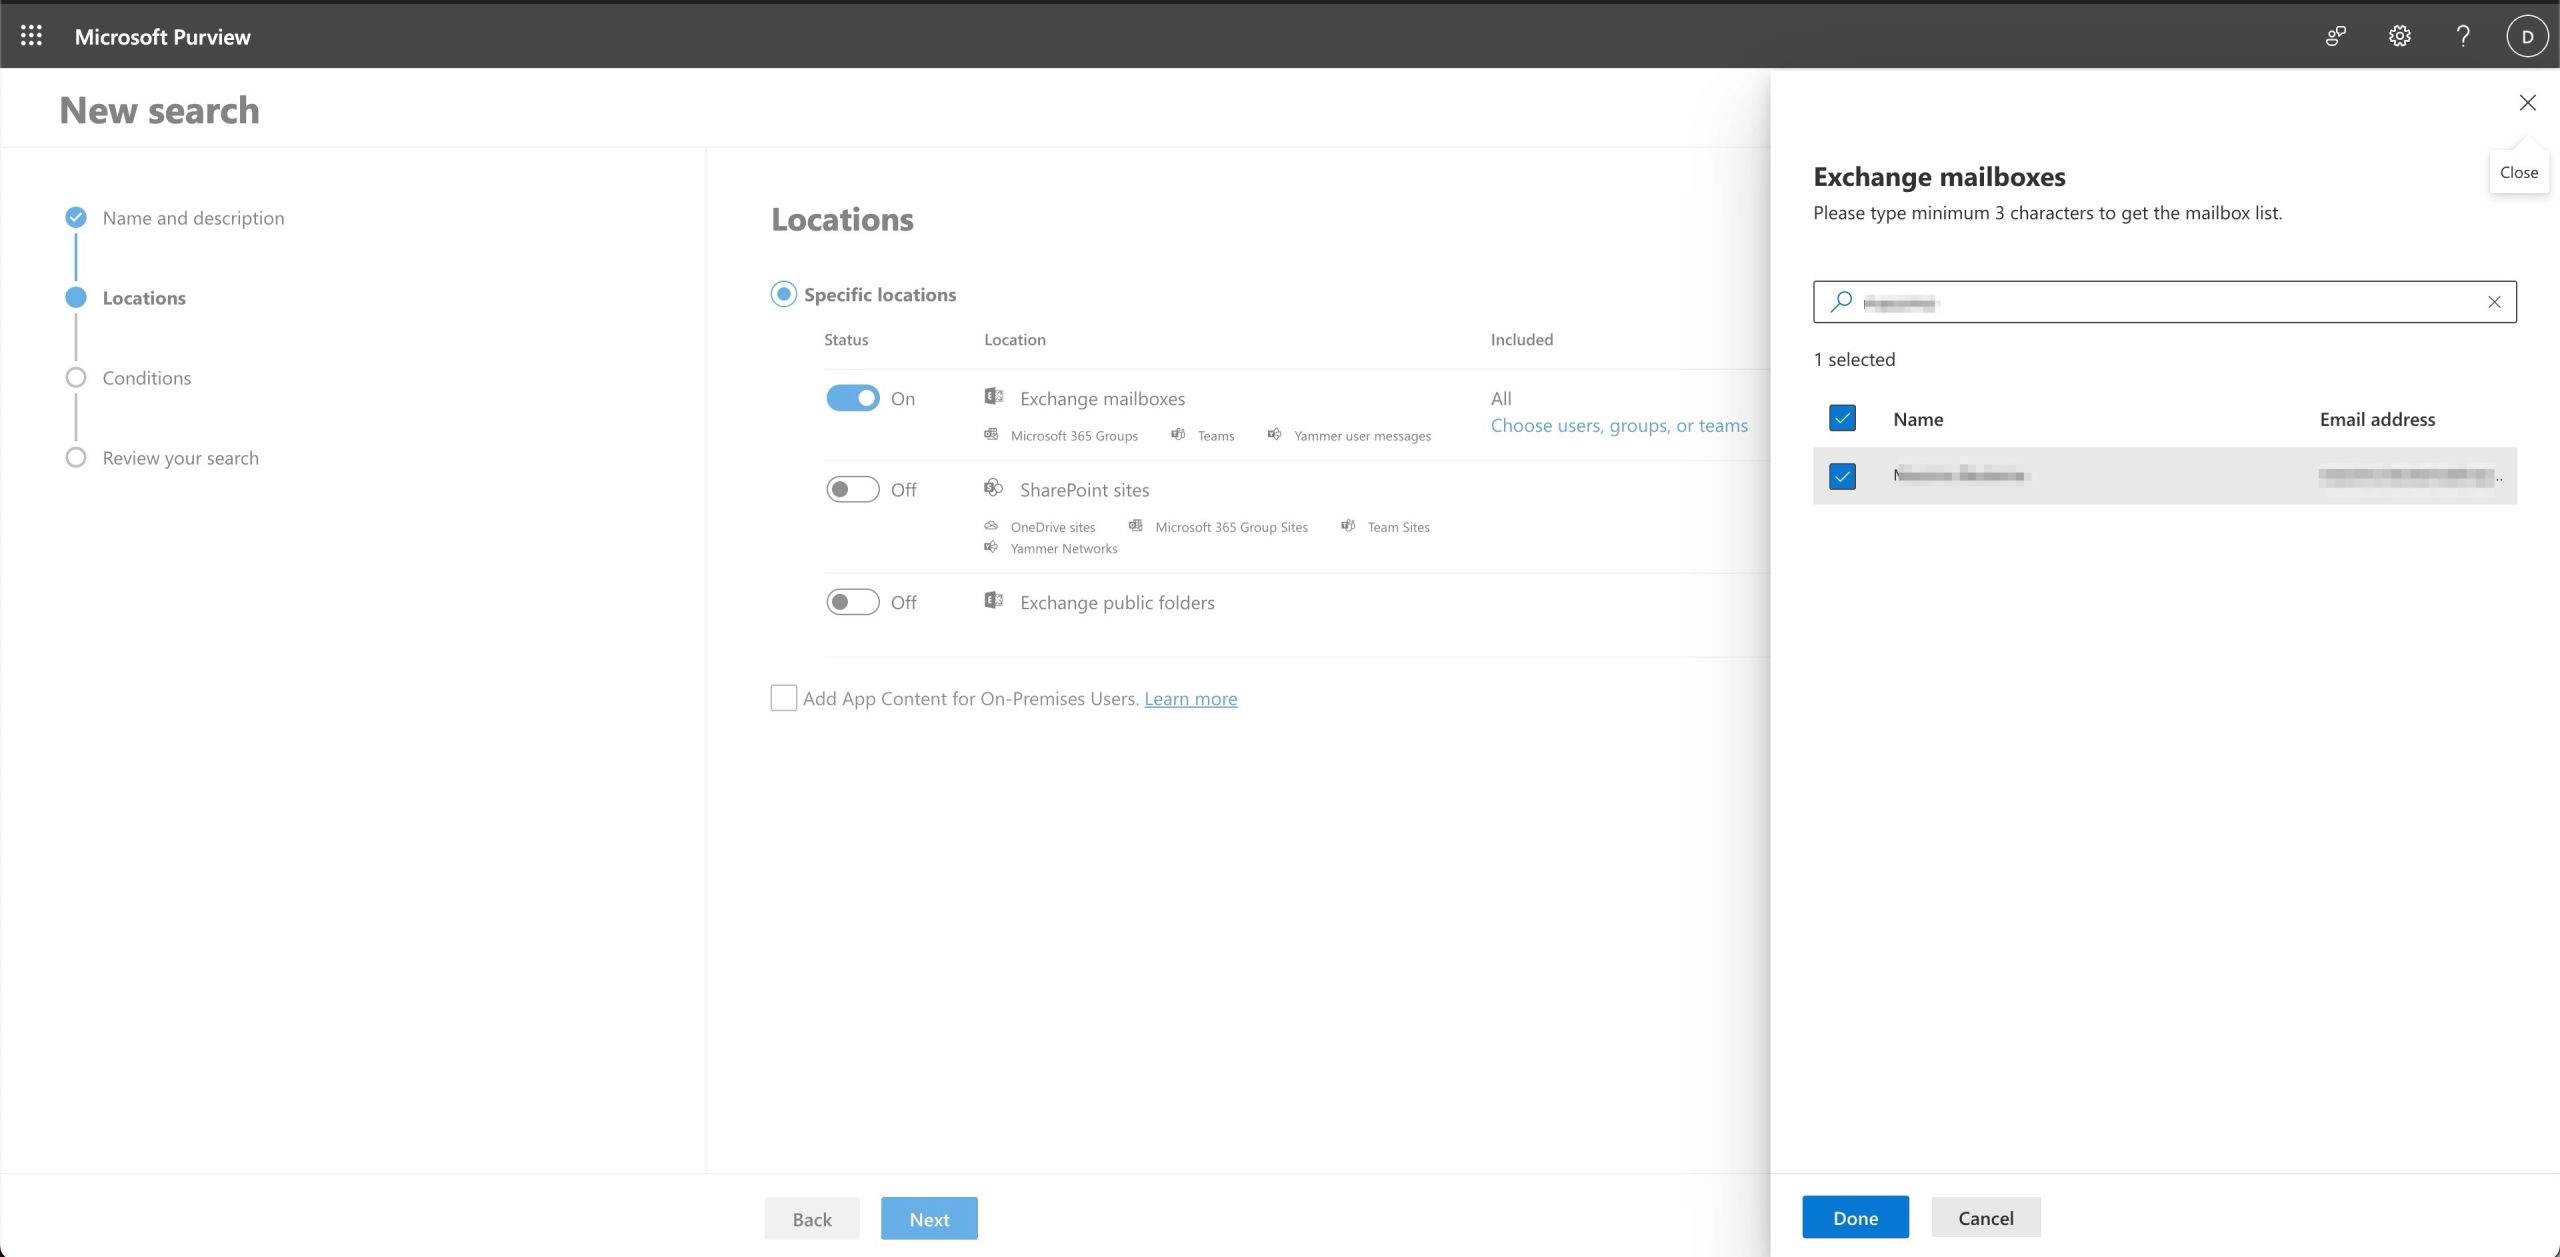
Select the user, group or Teams to export… in my case I’ve chosen a single user.
![](https://marcoschiavon.net/wp-content/uploads/2023/07/Screenshot_2023-07-28_at_12_16_03-scaled.jpg)
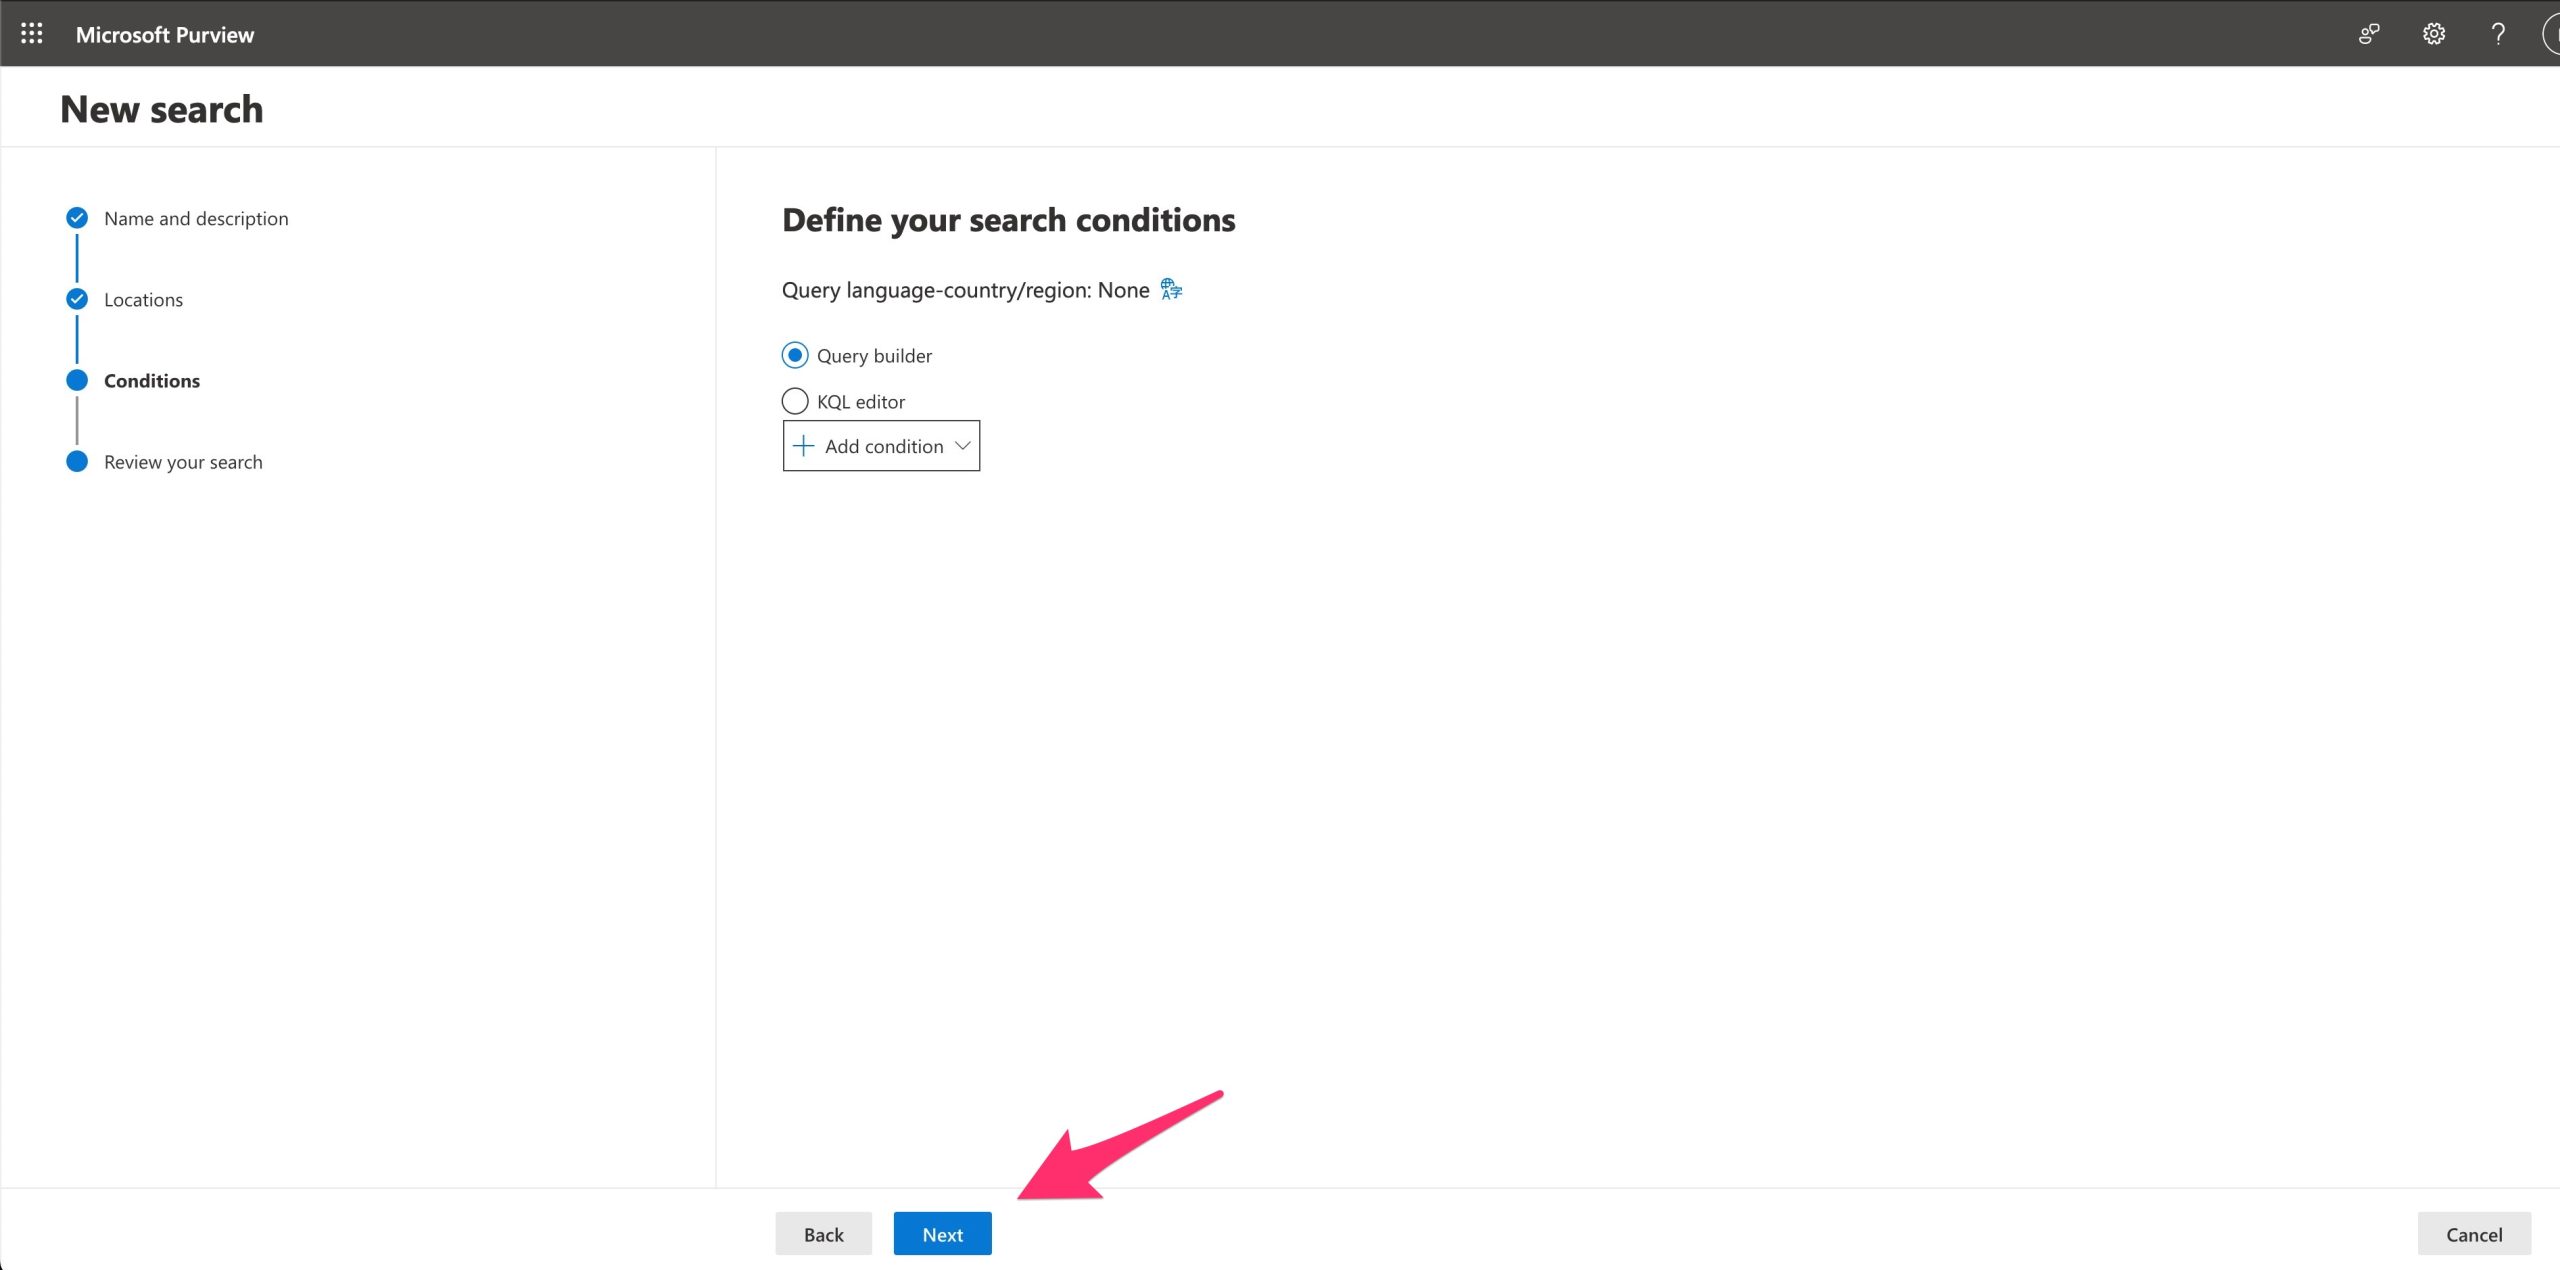
In the case you need to filter the data, use the Query builder, otherwise, go ahead exporting everything…
![](https://marcoschiavon.net/wp-content/uploads/2023/07/Screenshot_2023-07-28_at_12_19_21-scaled.jpg)
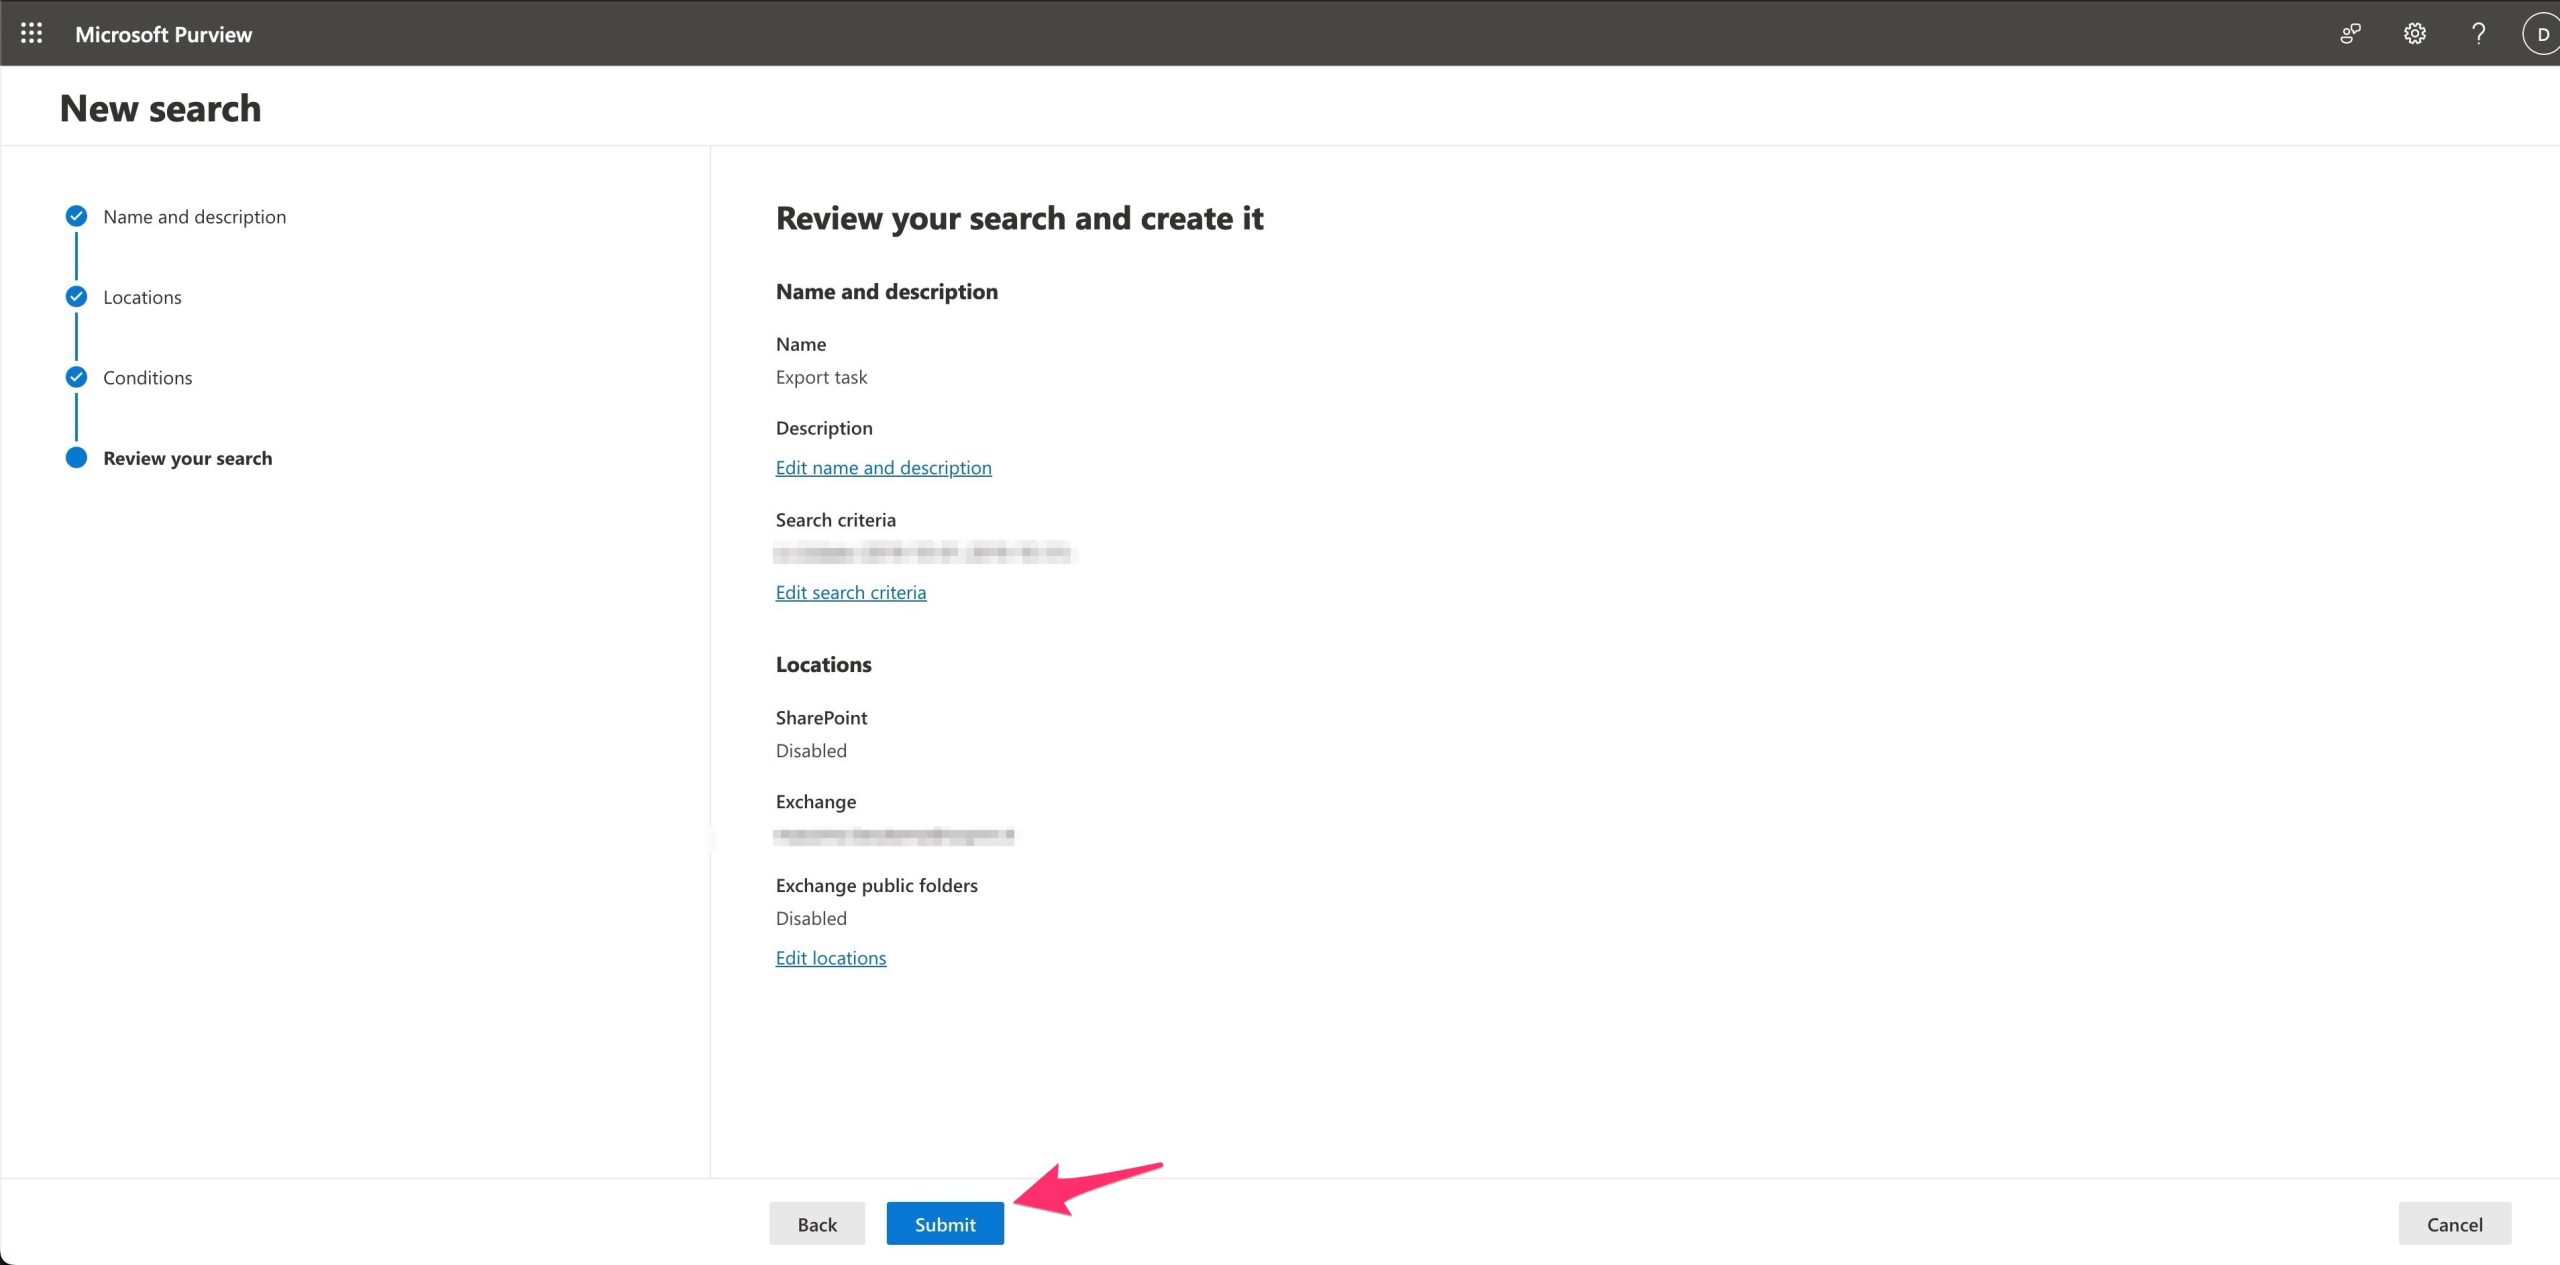
submit the search job
![](https://marcoschiavon.net/wp-content/uploads/2023/07/Screenshot_2023-07-28_at_12_29_14-scaled.jpg)
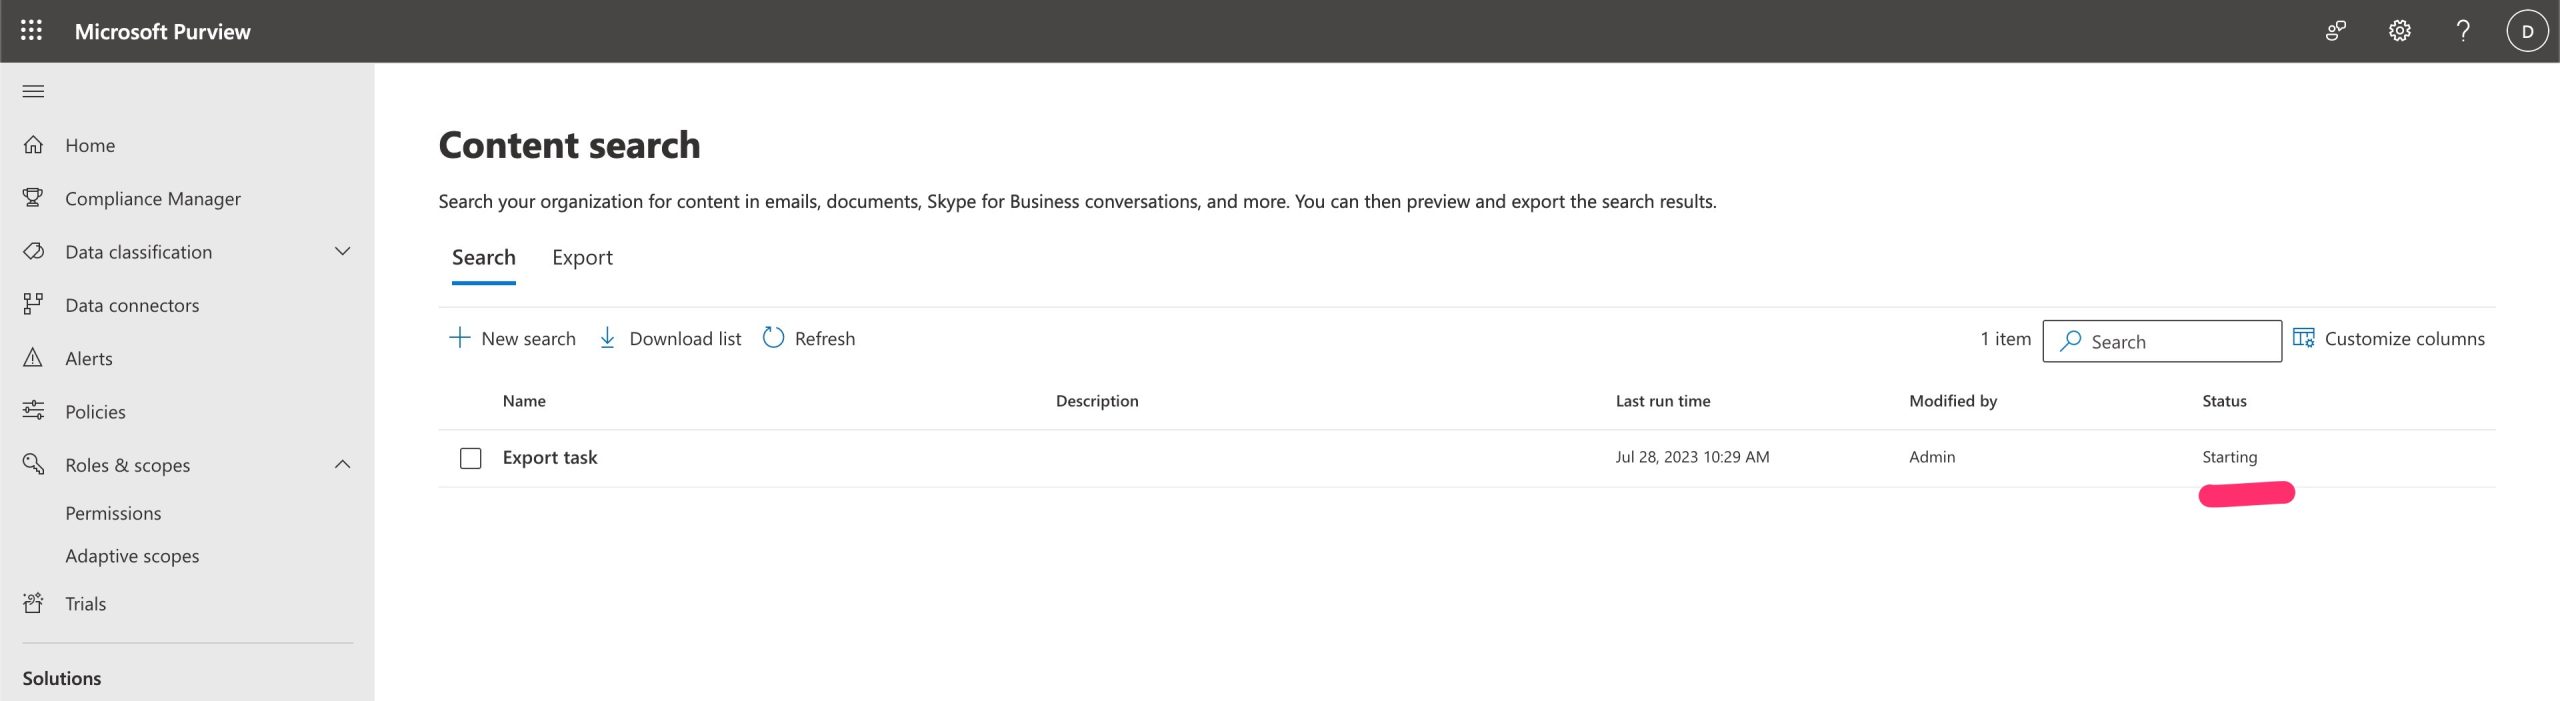
Now the job is submitted and we need only wait the status Completed (Starting=>Running=>Completed)
![](https://marcoschiavon.net/wp-content/uploads/2023/07/Screenshot_2023-07-28_at_12_29_55-scaled.jpg)
Now that is Completed, select the task and Export
![](https://marcoschiavon.net/wp-content/uploads/2023/07/Screenshot_2023-07-28_at_15_08_23-scaled.jpg)
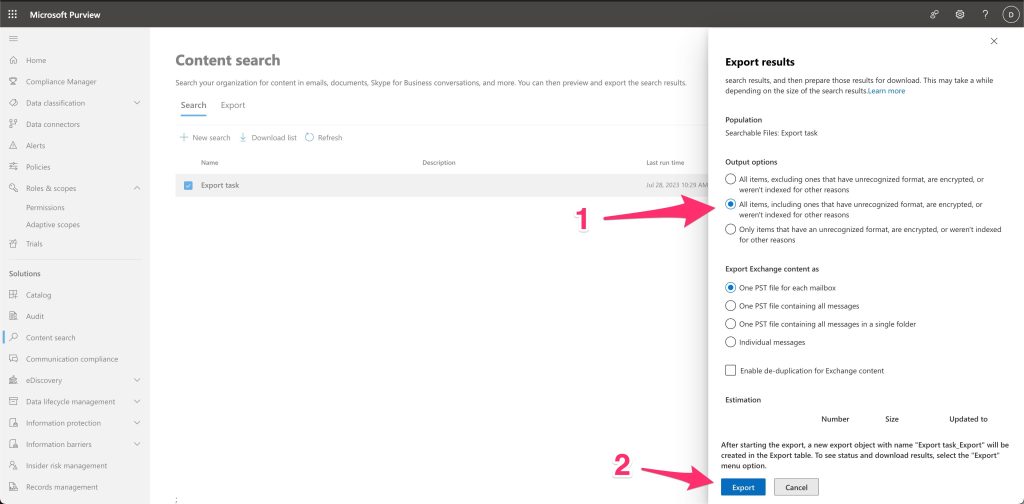
Now, select the second option to sure exporting everything…
![](https://marcoschiavon.net/wp-content/uploads/2023/07/Screenshot_2023-07-28_at_15_13_40-1024x504.jpg)
the task is starting and we need to wait…
![](https://marcoschiavon.net/wp-content/uploads/2023/07/Screenshot_2023-07-28_at_15_17_01-scaled.jpg)
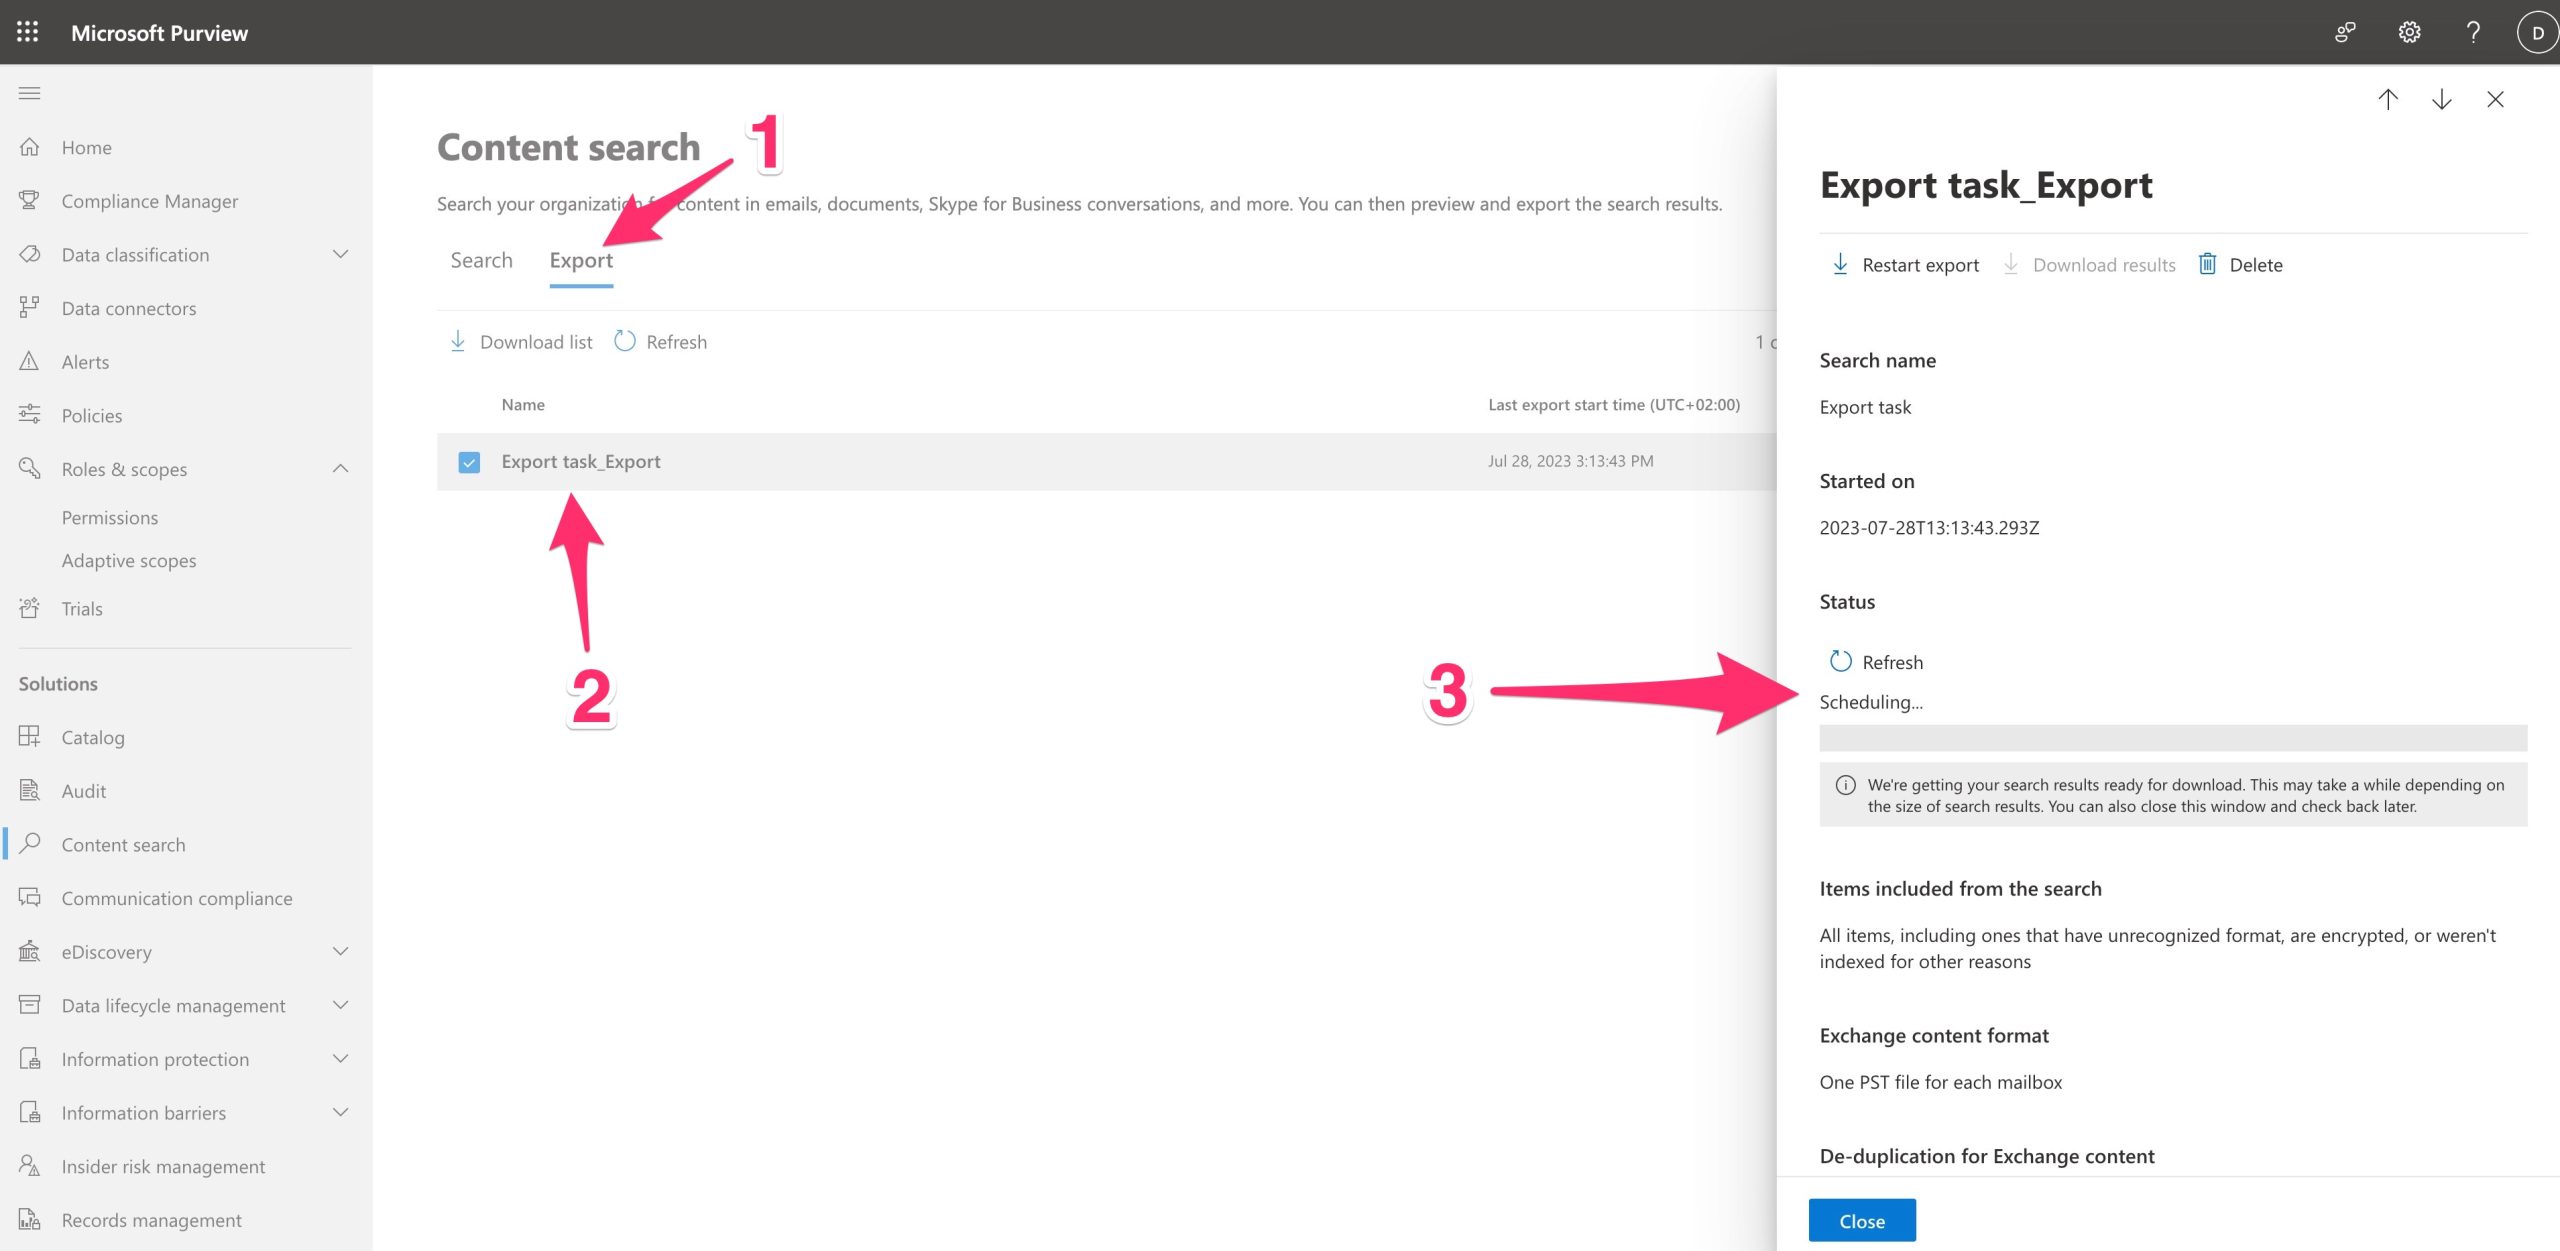
Now that is exported, we need to copy the “key” and select “Downloading results”
NB: this applet works only with EDGE or IE!!
![](https://marcoschiavon.net/wp-content/uploads/2023/07/Screenshot_2023-07-28_at_15_20_23-1024x502.jpg)
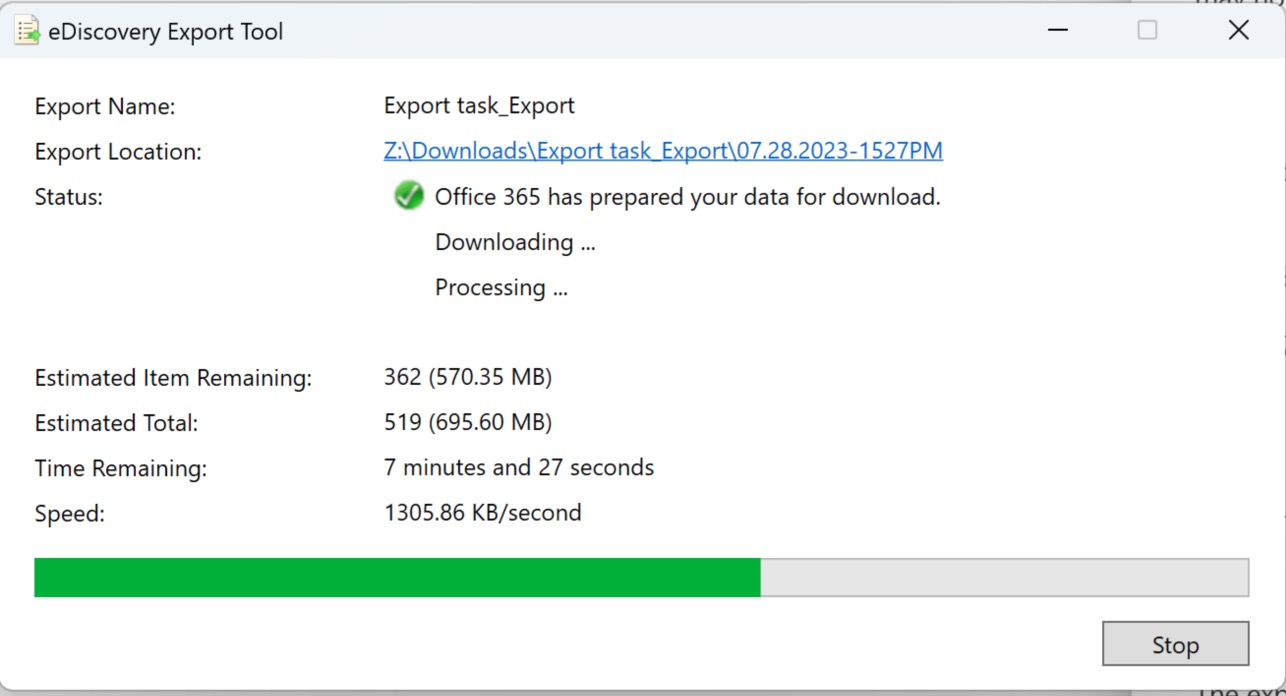
The eDiscovery Export Tool will start … Put the “key” that you copied, select a path where download the PST and finally, press Start.
![](https://marcoschiavon.net/wp-content/uploads/2023/07/Screenshot_2023-07-28_at_15_27_49-scaled.jpg)
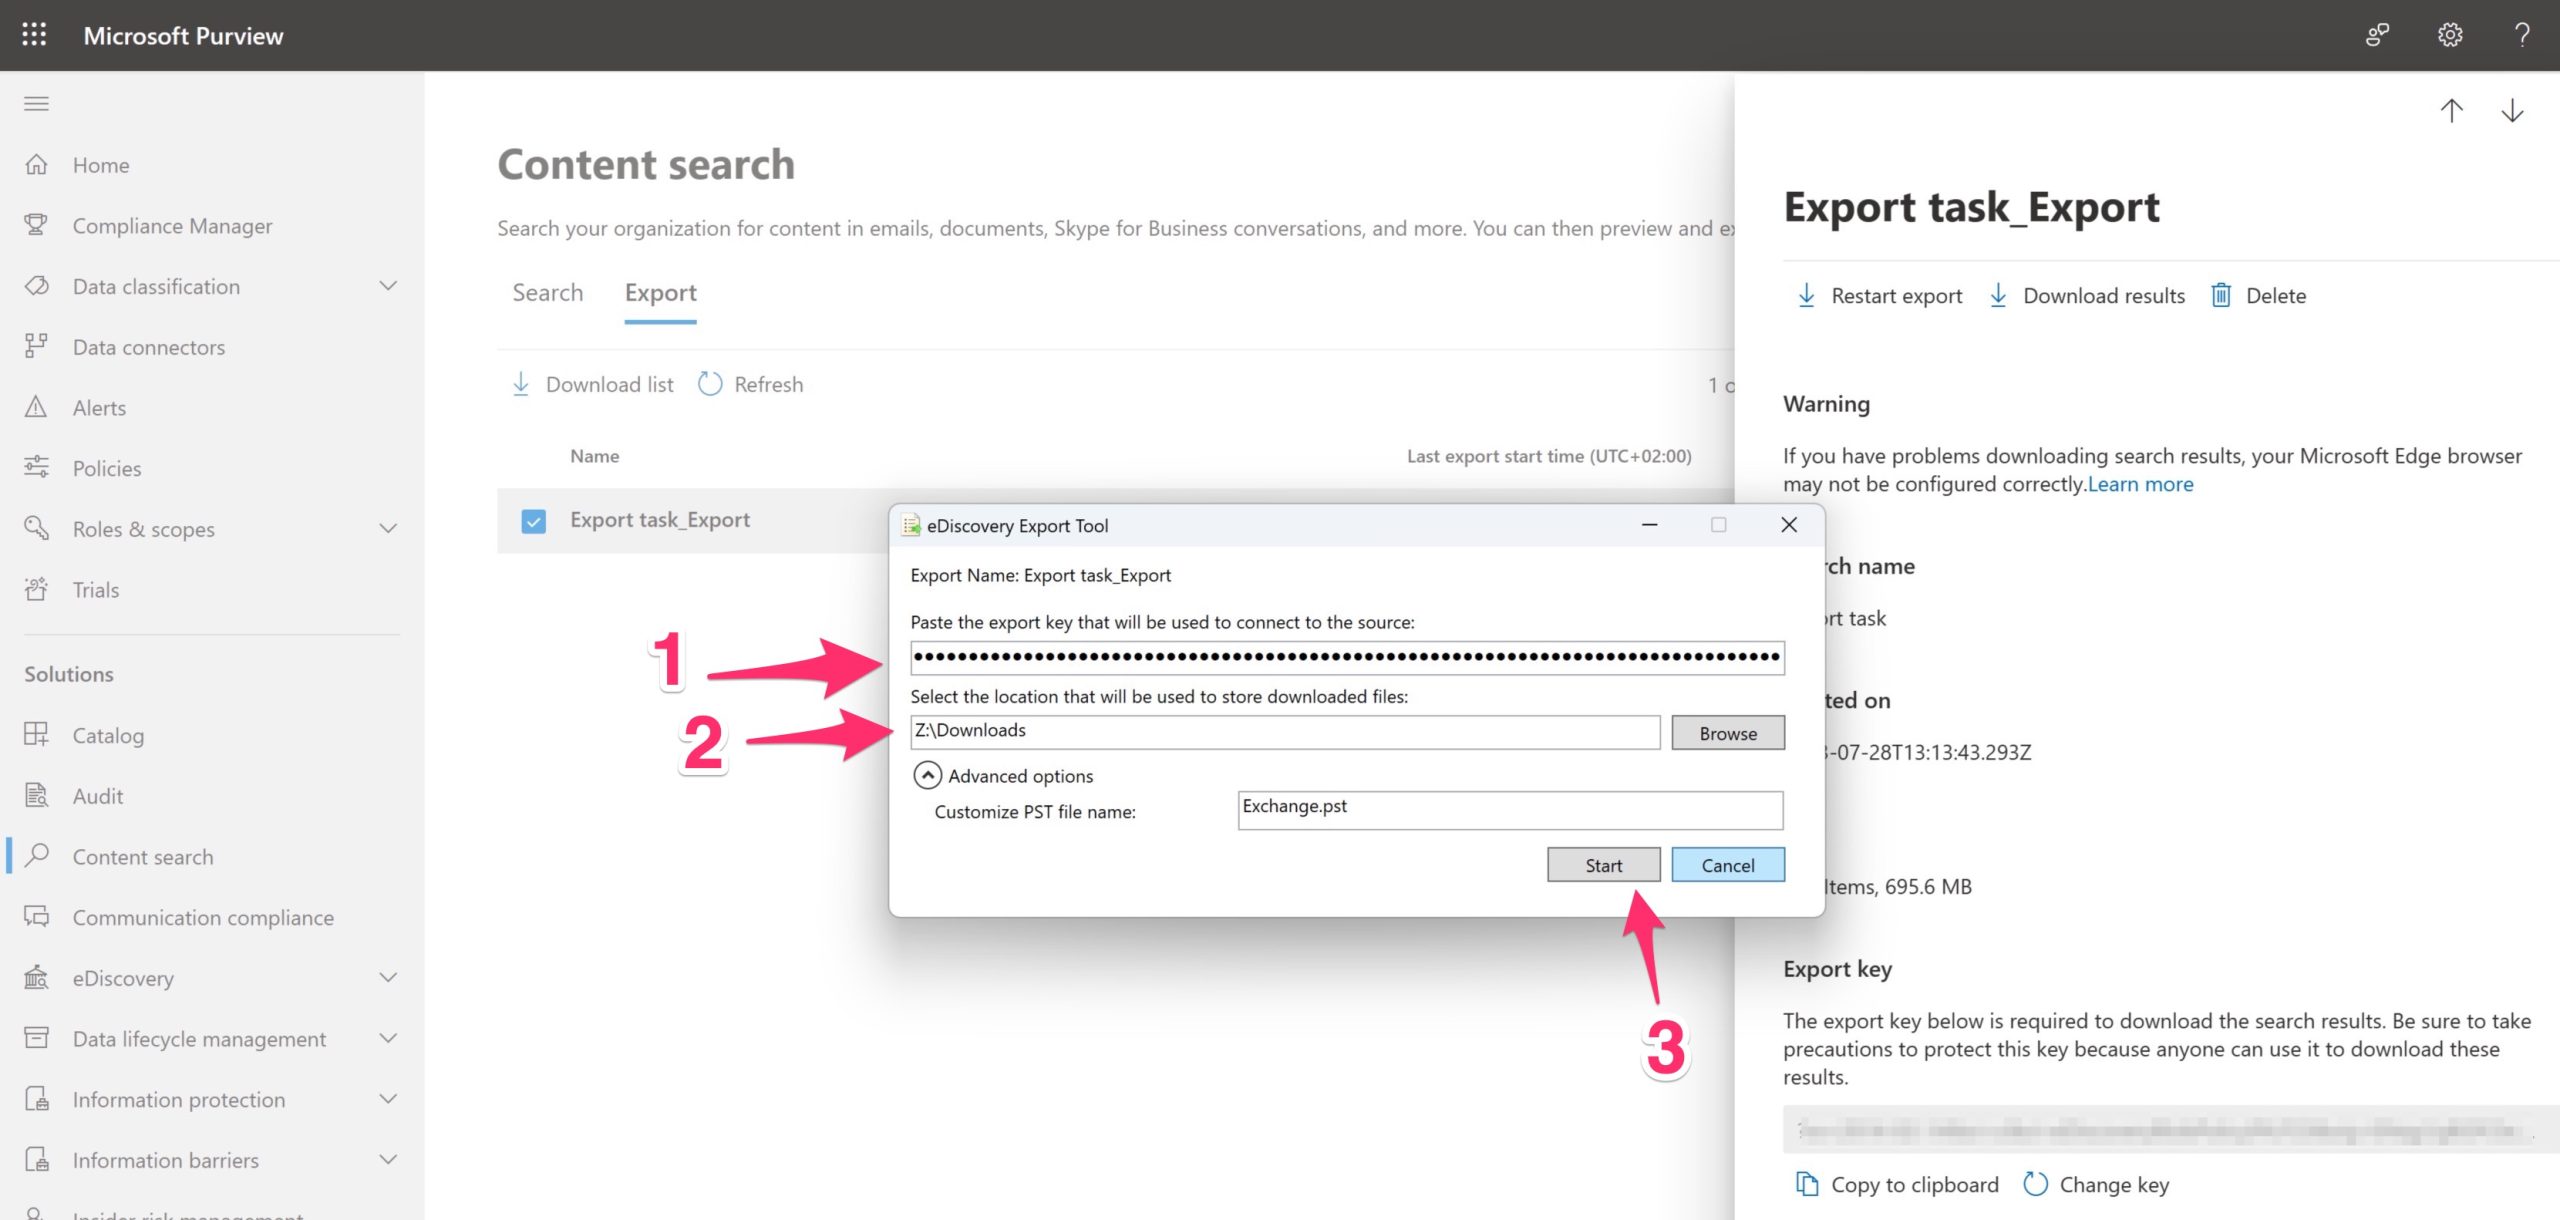
The download is started…
![](https://marcoschiavon.net/wp-content/uploads/2023/07/Screenshot-2023-07-28-at-15.29.38.jpg)
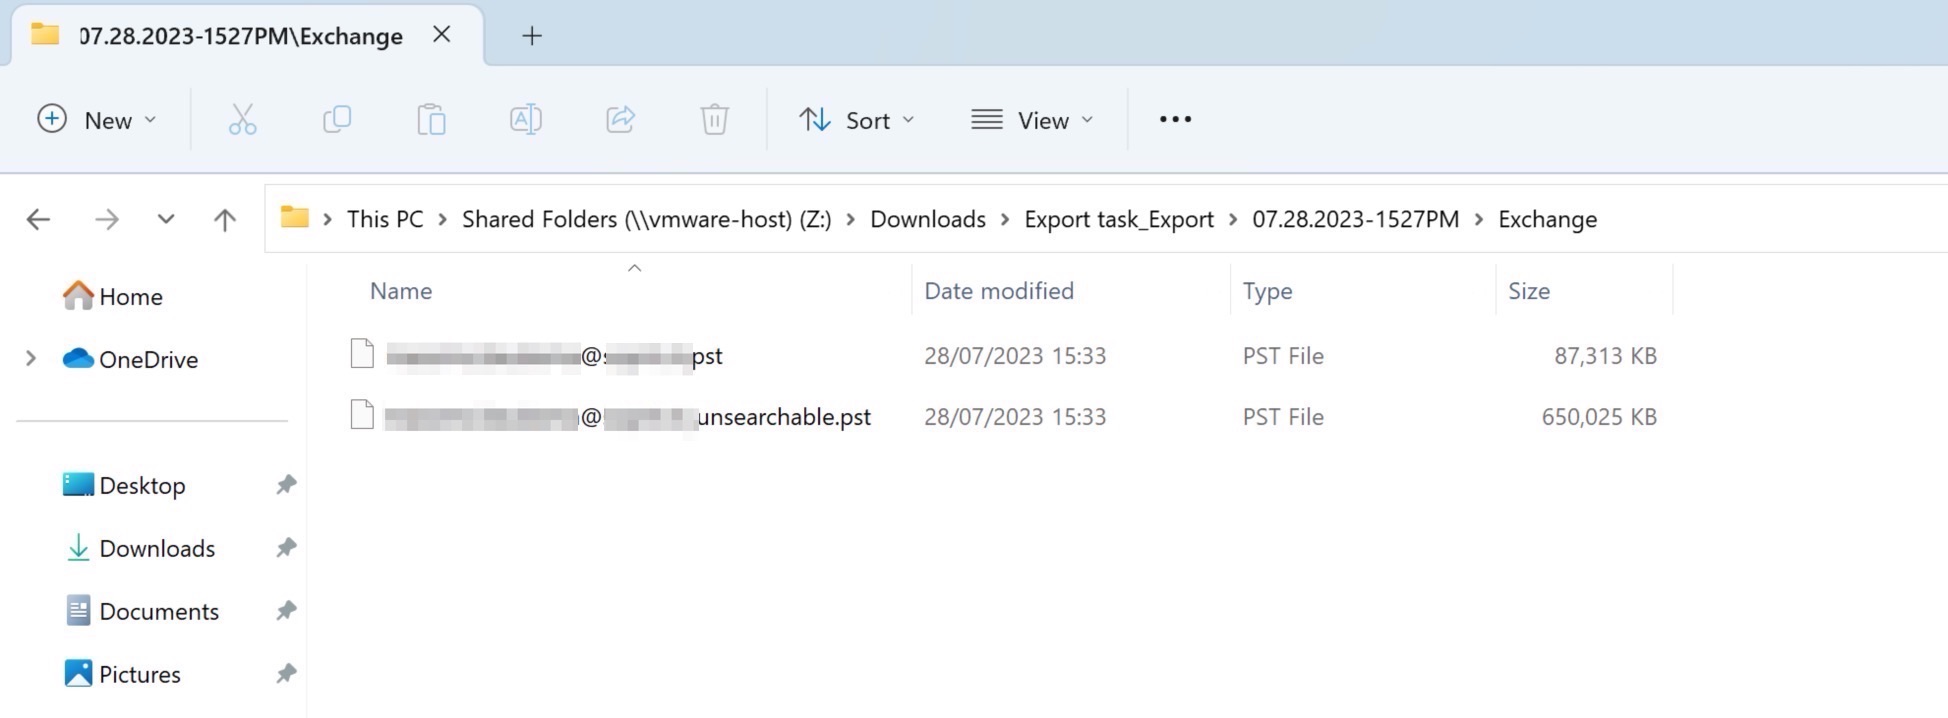
When the task is finished, all the PSTs will be on the path that you’ve devided.
![](https://marcoschiavon.net/wp-content/uploads/2023/07/Screenshot_2023-07-28_at_15_42_52.jpg)