
Open storage manager and select HDD/SSD section
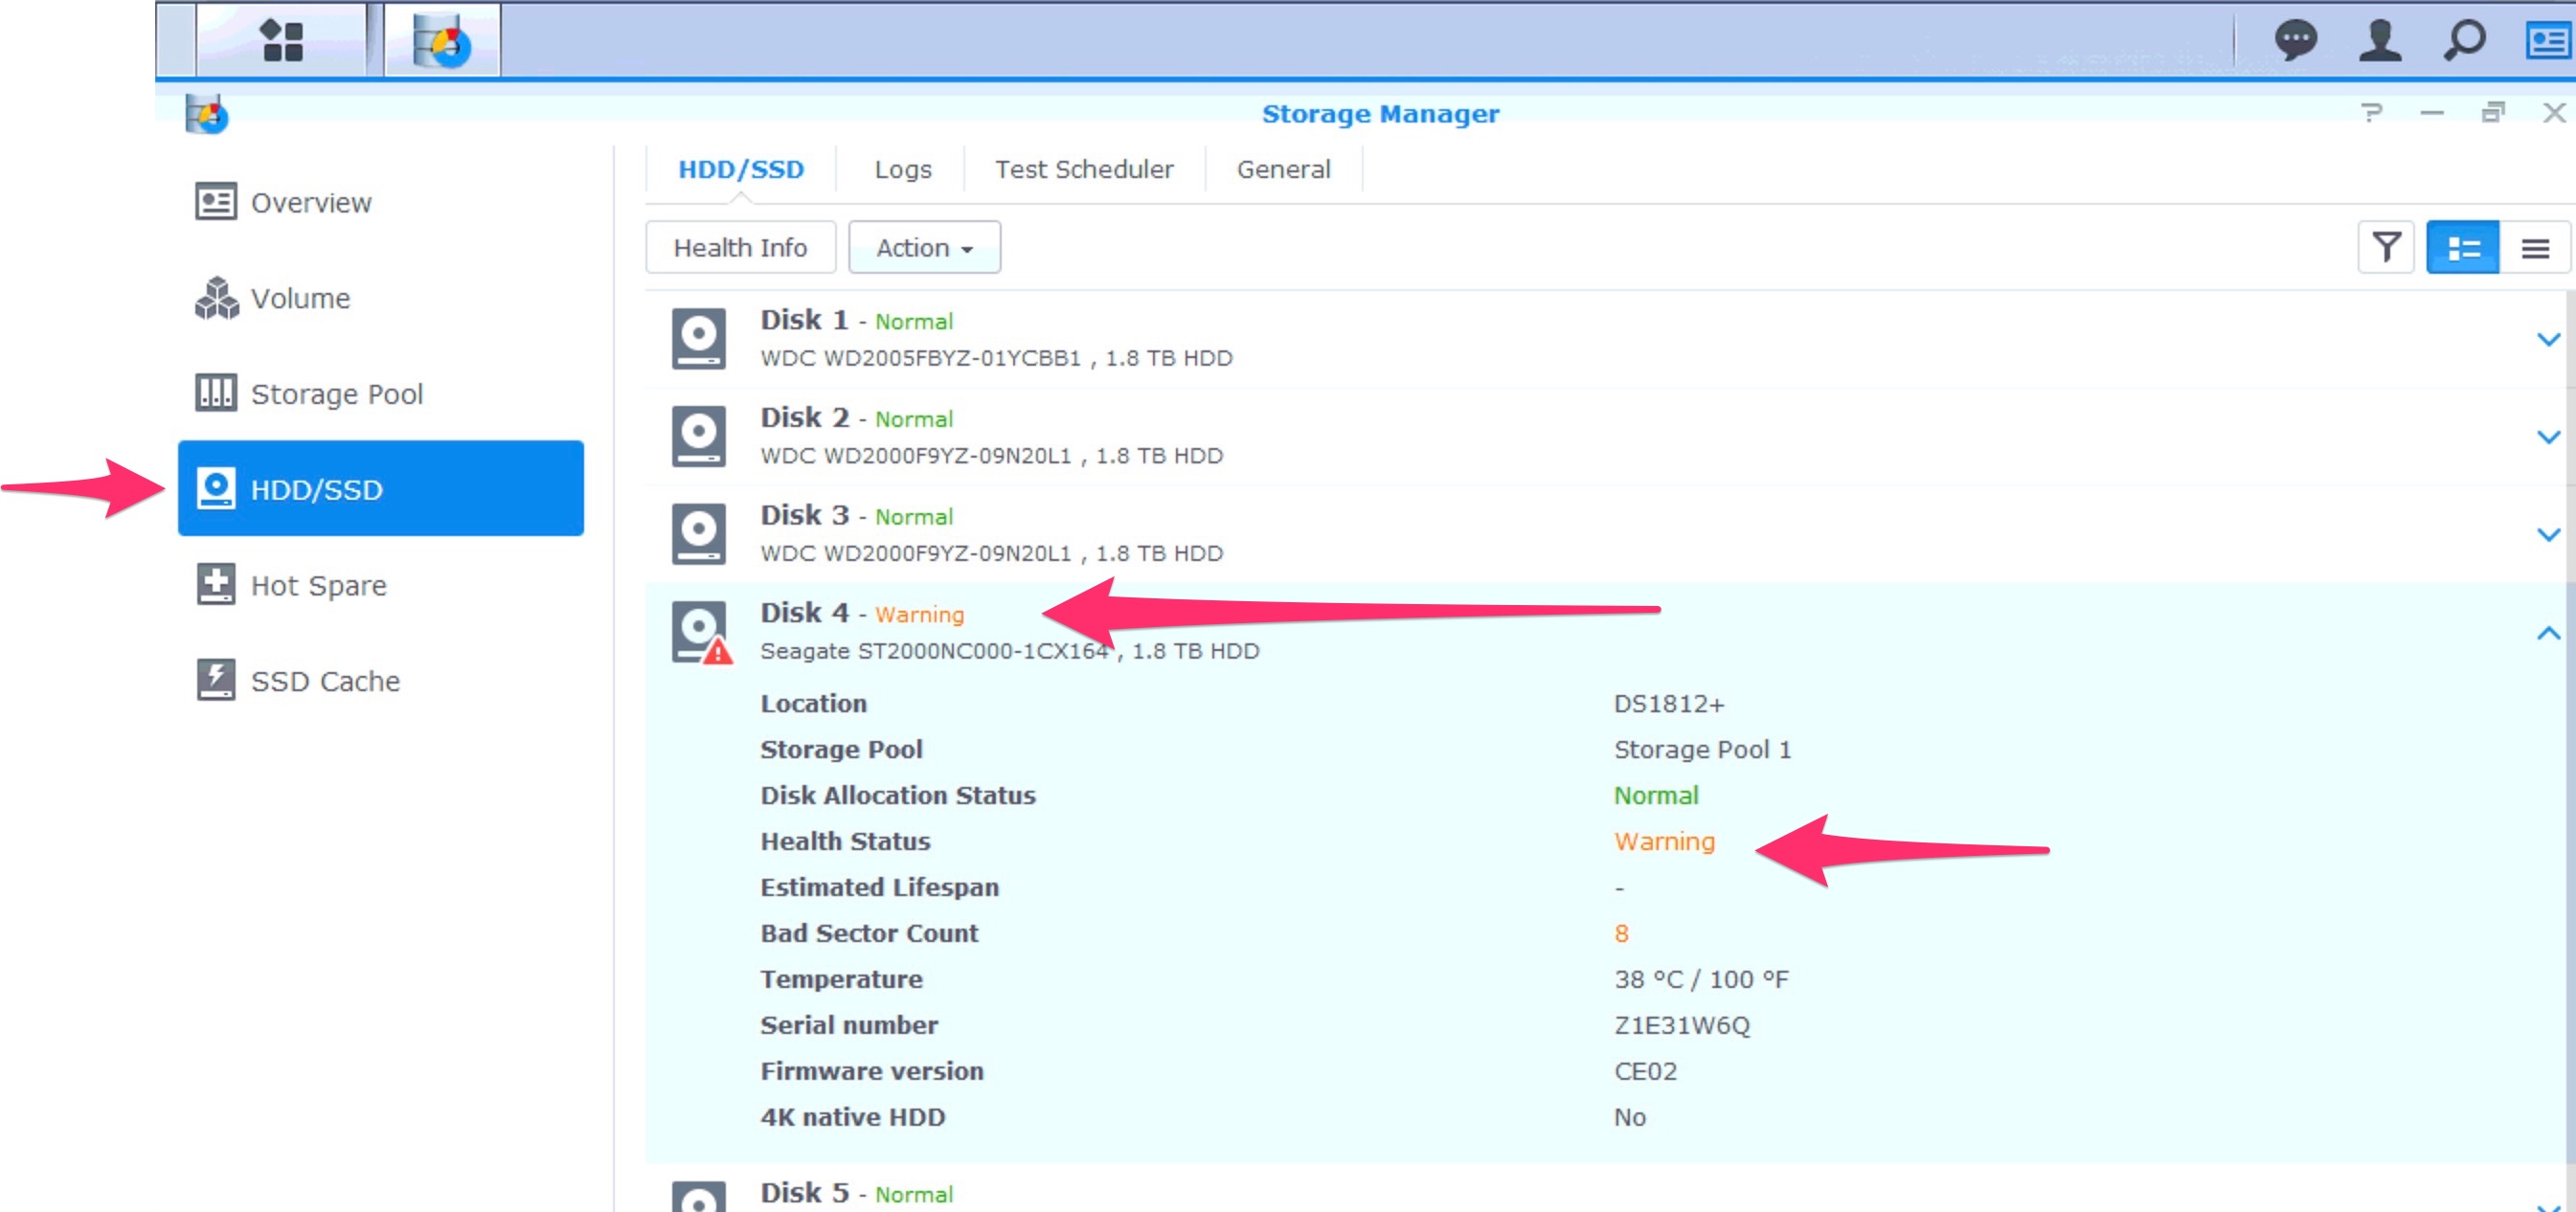
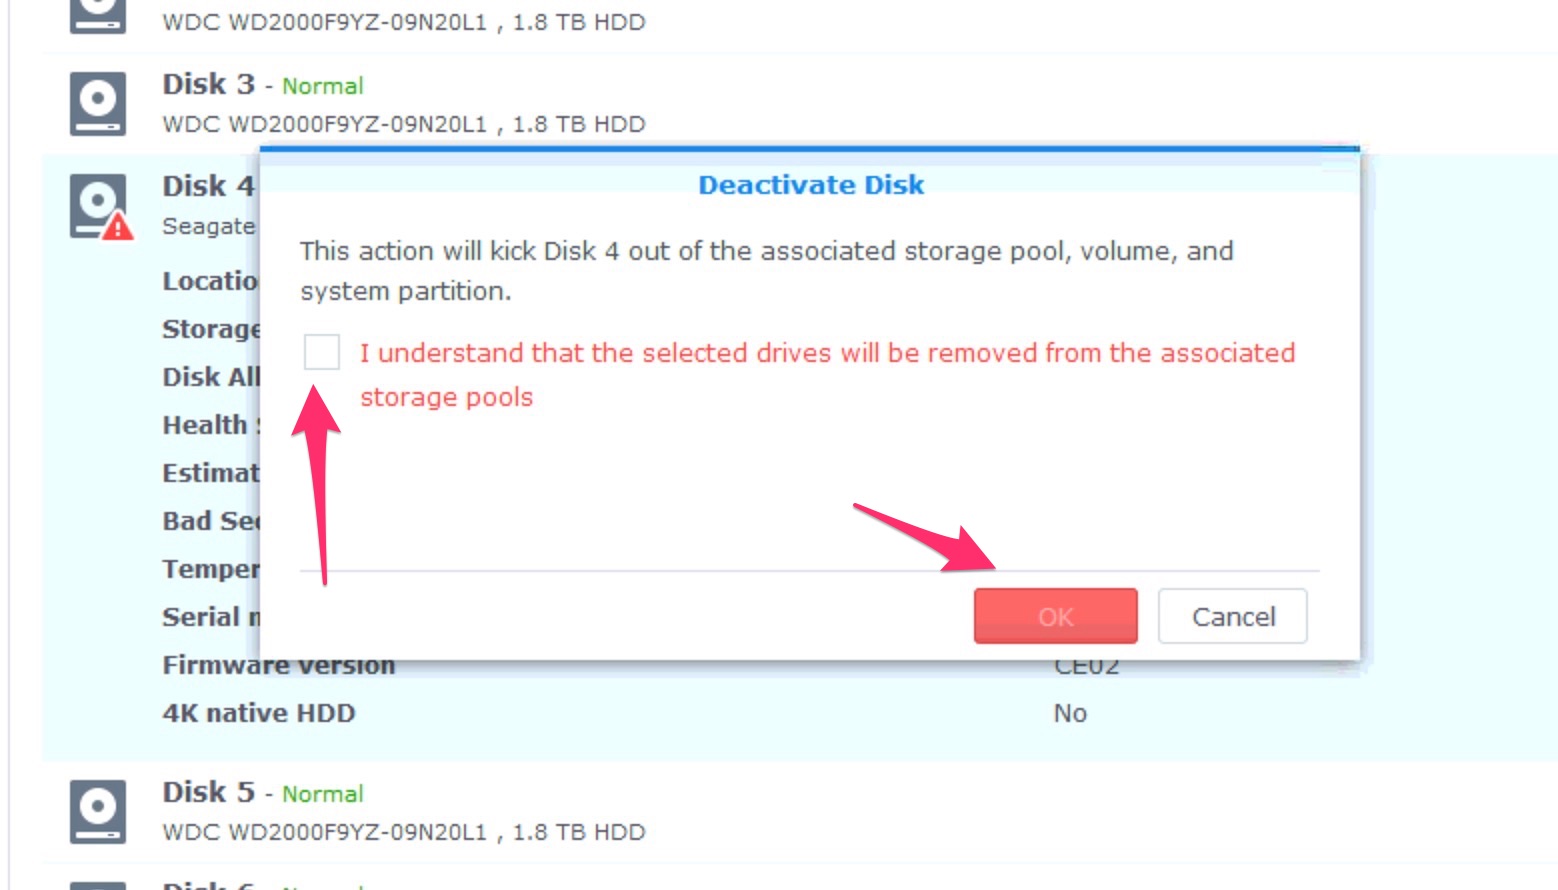
Select Action and then, Deactivate.
If you don’t know which is the slot where the disk is , select “Swich Drive Indicator Status” to find it..

Flag the warning and select OK…
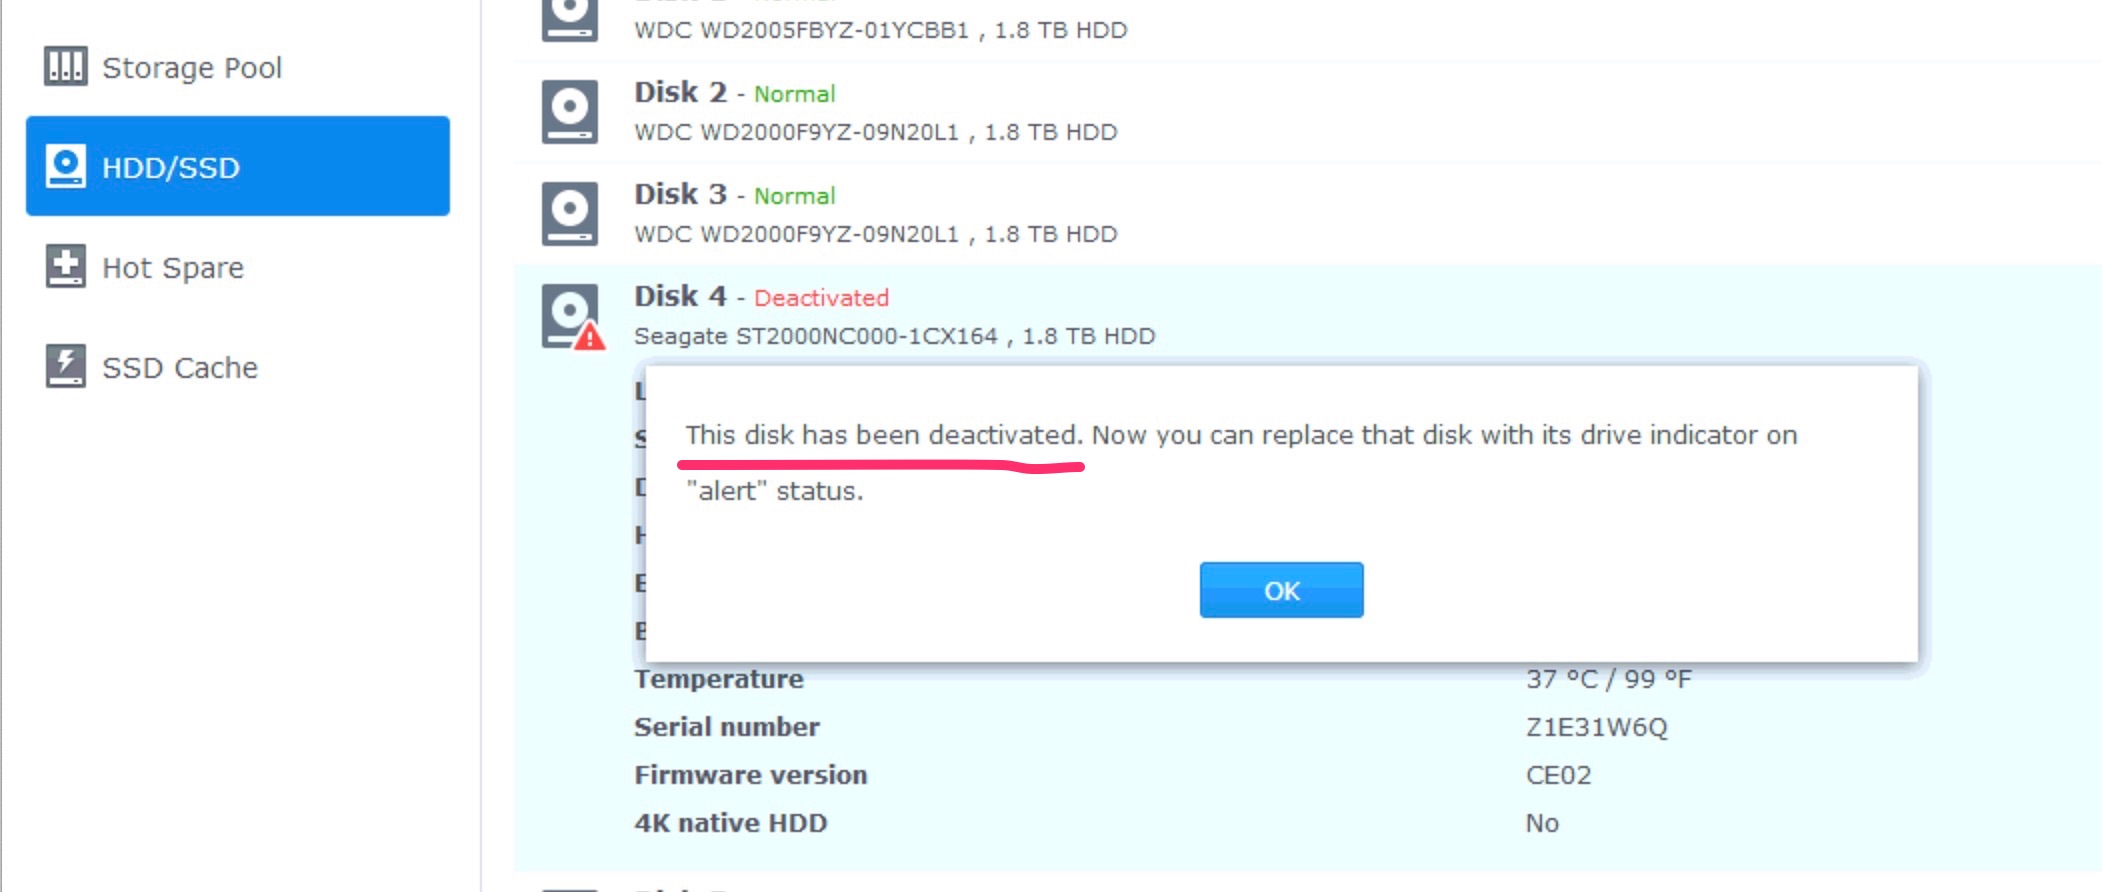
now ww can replace the drive….
At this point the array starts to rebuild…
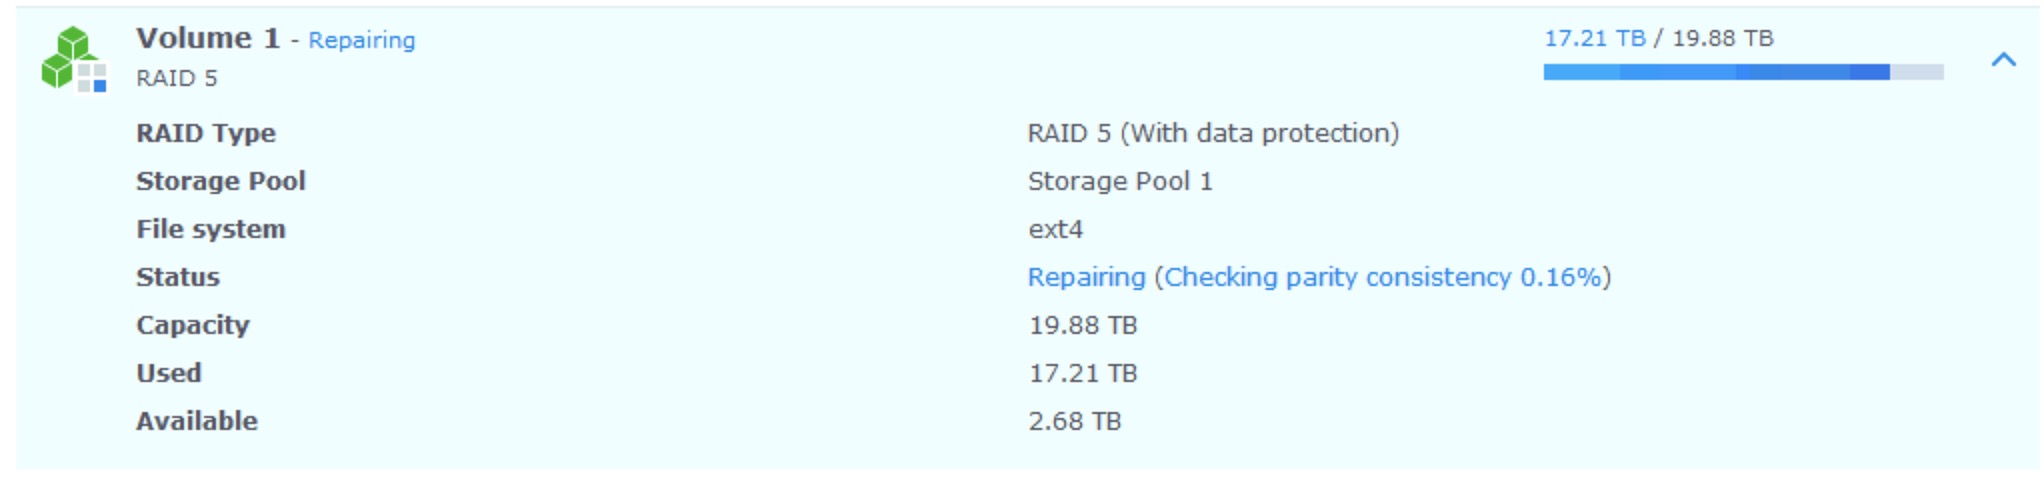
We need to insert the new drive and wait ending the rebuilding task to add the new drive to the array as a Hot Spare.
It could be happen at the end that the NAS requests a reboot to make a file system check.. Do it.
Thanks used it today. Great supplement to clarify the Synology website instructions.
you are welcome!
M.
I was looking for a visual representation of this function. Thanks
you are welcome!