
|
1 2 3 4 |
<a href="https://marcoschiavon.net/migrate-from-exchange-2010-13-to-exchange-2016---part-one/"><a href="https://marcoschiavon.net/migrate-from-exchange-2010-13-to-exchange-2016---part-one/">Migrate from Exchange 2013 to Exchange 2016 - Part one</a> <a href="https://marcoschiavon.net/migrate-from-exchange-2010-13-to-exchange-2016---part-two/">Migrate from Exchange 2013 to Exchange 2016 - Part two</a> <a href="https://marcoschiavon.net/migrate-from-exchange-2010-13-to-exchange-2016---part-three/">Migrate from Exchange 2013 to Exchange 2016 - Part three</a> <a href="https://marcoschiavon.net/migrate-from-exchange-2010-13-to-exchange-2016-part-four/">Migrate from Exchange 2013 to Exchange 2016 - Part four</a></a> |
At this point we have :
- one Exchange server 2013
- one Exchange server 2016
- all the virtual directory and mailboxes are still on the 2013.
Now we have to :
- move all the mailbox from the Exchange 2013 to Exchange 2016
- switch the A internal and external records and the move the mailbox.
- decommissioning the old Exchange 2013.
Before proceed, to understand better our situation, we can rename the Exchange servers DB to reflect better who they are..
So this is our situation :
Get-Mailbox -Arbitration | FL Name,DisplayName,ServerName,Database,AdminDisplayVersion

Now I rename both DBs to reflect Exchange2013DB and Exchange2016DB
Set-MailboxDatabase “Mailbox Database 1985575706” -Name “EXCH-2013”
Set-MailboxDatabase “Mailbox Database 1018107093” -Name “EXCH-2016”

1 – move all the mailbox from the Exchange 2013.
Before moving all the mailboxes, this is our situations:
Get-Mailbox -Database “EXCH-2013”

Get-Mailbox -Database “EXCH-2016”

let’s go!, move all mailboxes form EXCH-2013 to EXCH-2016
Get-Mailbox -Database “EXCH-2013” -ResultSize Unlimited | New-MoveRequest -TargetDatabase “EXCH-2016”

Check the state:
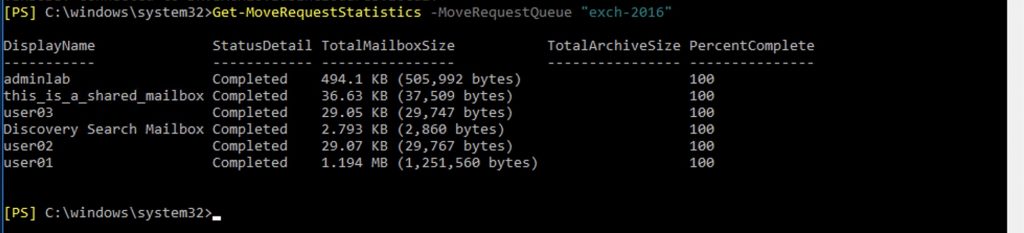
Get-MoveRequestStatistics -MoveRequestQueue “exch-2016”

now we are here :

get the status :
Get-MoveRequestStatistics -MoveRequestQueue “exch-2016”
Ok, at this point we need to clear the move request with this command:
Get-MoveRequest | where {$_.status -eq “Completed”} | Remove-MoveRequest
Now, we need to move from Exchange 2013 to 2016 the Arbitriation mailboxes
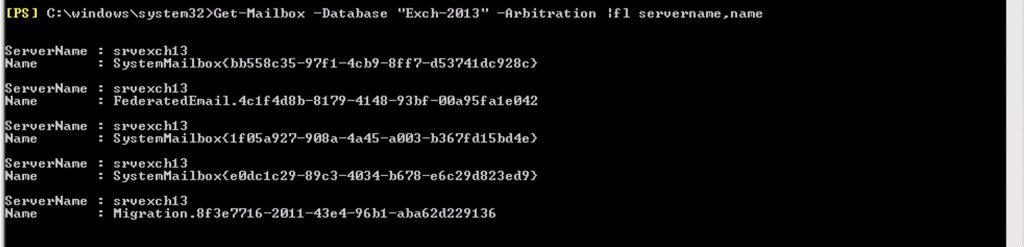
These are the Arbitration on Exchange 2013:
Get-Mailbox -Database “Exch-2013” -Arbitration |fl servername,name
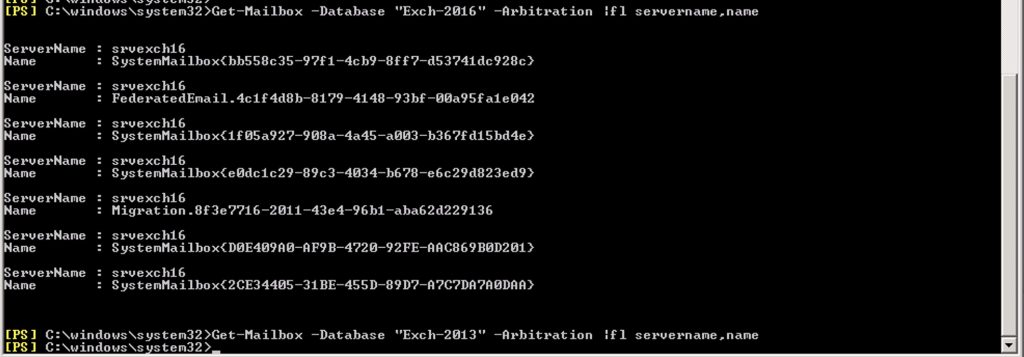
And these on 2016:

move them with this command:
Get-Mailbox -Database “exch-2013” -Arbitration | New-MoveRequest -TargetDatabase “exch-2016”

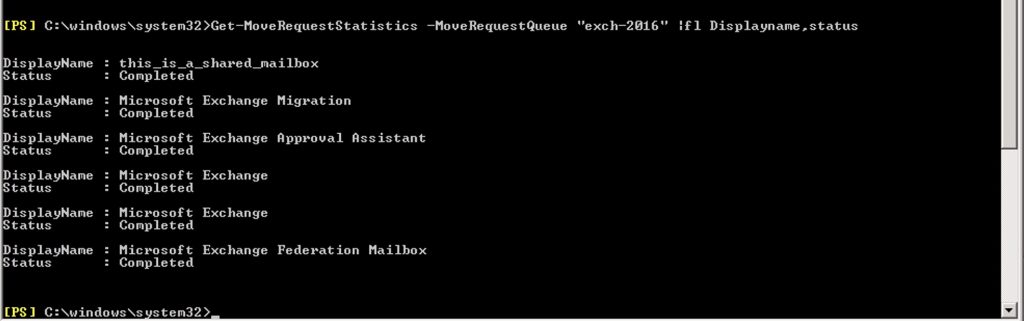
Check the status of the migration job
Get-MoveRequestStatistics -MoveRequestQueue “exch-2016” |fl Displayname,status
Now we need to clear the move request and check the Arbitration mailboxes on the Exchange 2016
It’s done.
At this point, we need add the Exchage 2016 as sender server, and modify the split-brain dns.
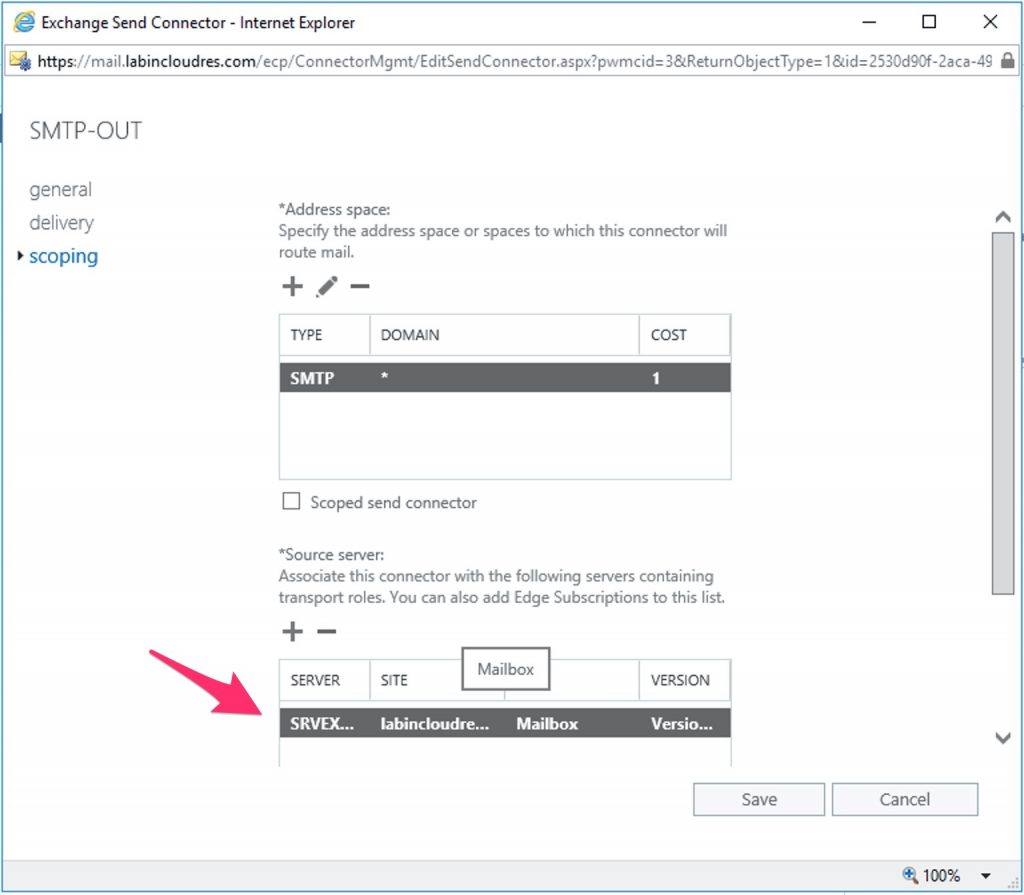
Edit your send connector
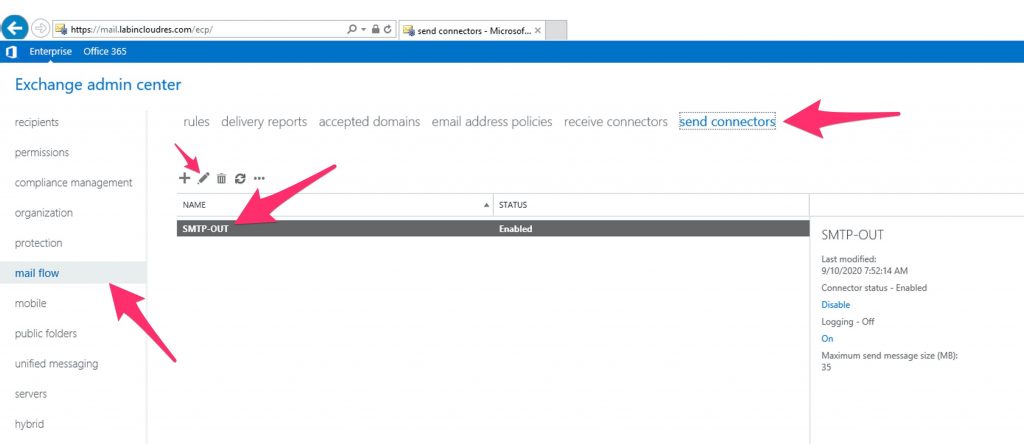
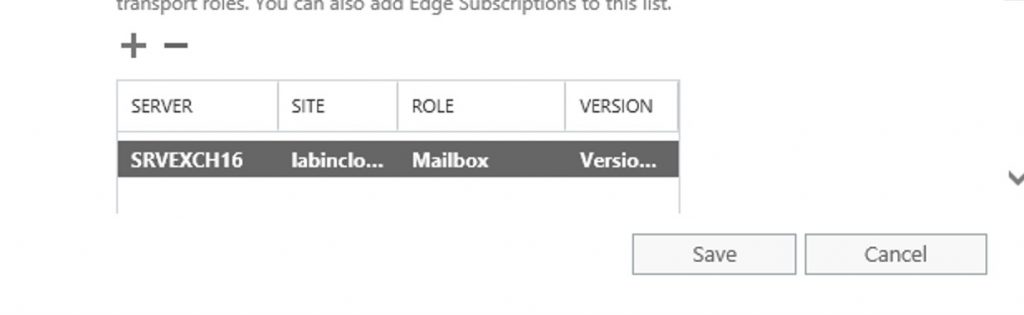
add the exchange 2016 and remove 2013.
Now we need to Export and import the “Receive Connectors”
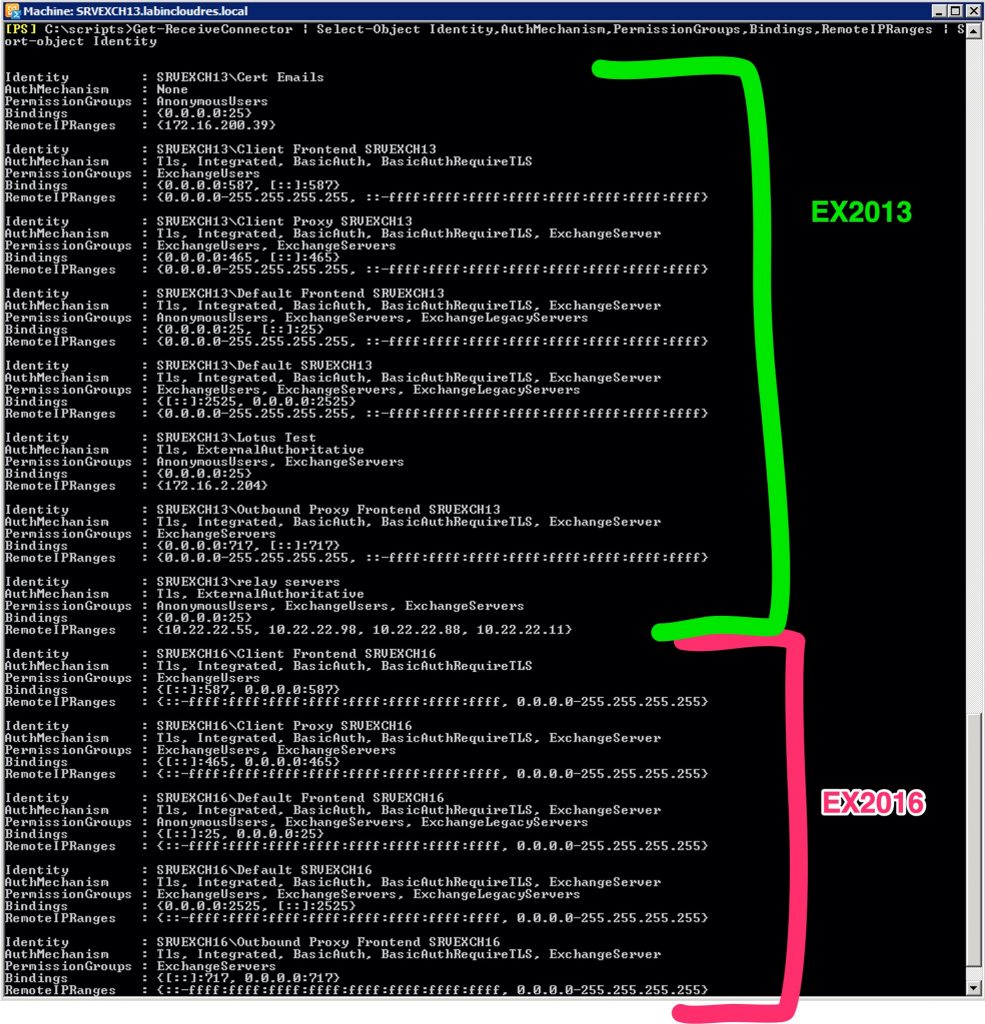
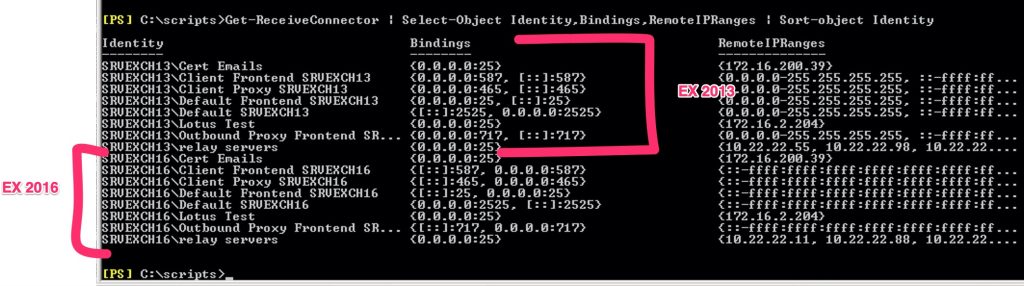
To get the situation on the old server run this:
Get-ReceiveConnector | Select-Object Identity,AuthMechanism,PermissionGroups,Bindings,RemoteIPRanges | Sort-object Identity
To export and import the connectors, I use the ps1 script “Copy-ReceiveConnector.ps1” created by Michel de Rooij https://gallery.technet.microsoft.com/Copying-Receive-Connector-c7c107db
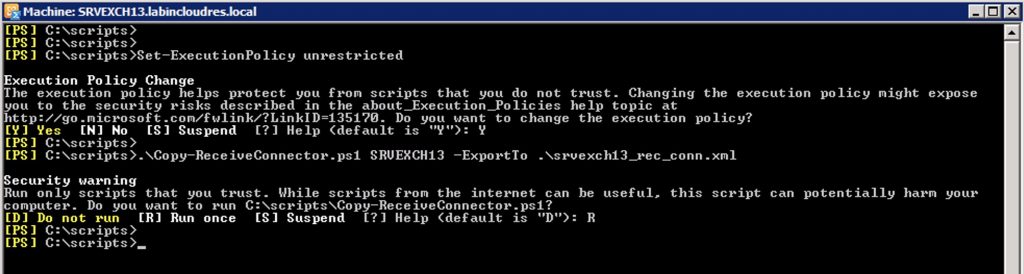
First, Export the connector from the Exchange 2013 :
Set-ExecutionPolicy unrestricted
.\Copy-ReceiveConnector.ps1 SRVEXCH13 -ExportTo .\srvexch13_rec_conn.xml
At this point, we have to import the connectors to the Exchange 2016 .
I’ll do an import with the “clear” command to clear the connectors before import.
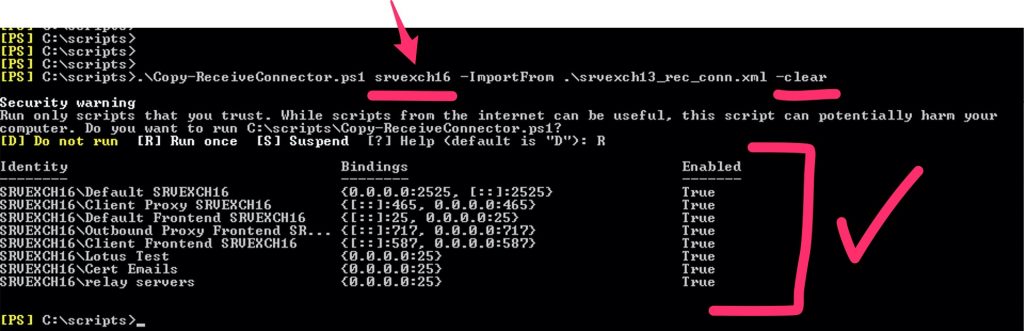
Now re-run the command to show the connectors
Get-ReceiveConnector | Select-Object Identity,AuthMechanism,PermissionGroups,Bindings,RemoteIPRanges | Sort-object Identity
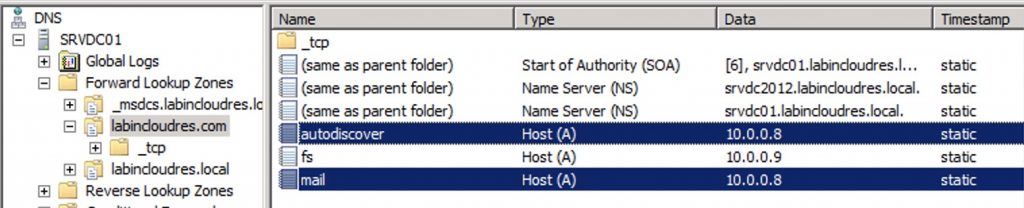
Now, we need to change the internal DNS record to point to the exchange 2016 ip .
We can lower the TTL to permit a more quick procedure..
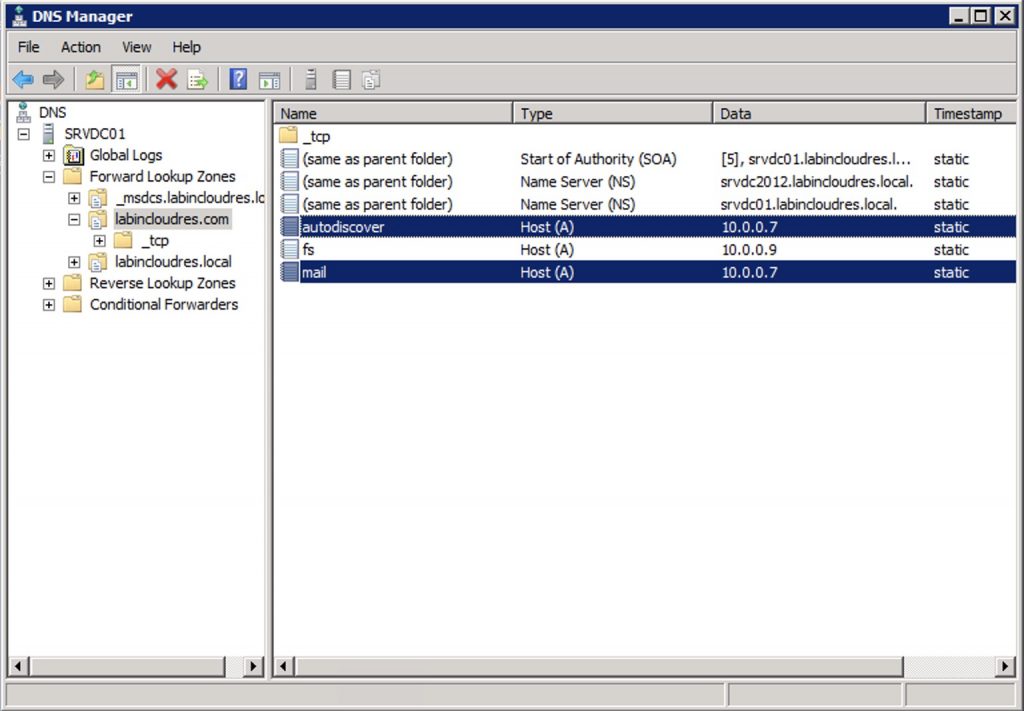
I changed to 0.8 that is out Exchange 2016
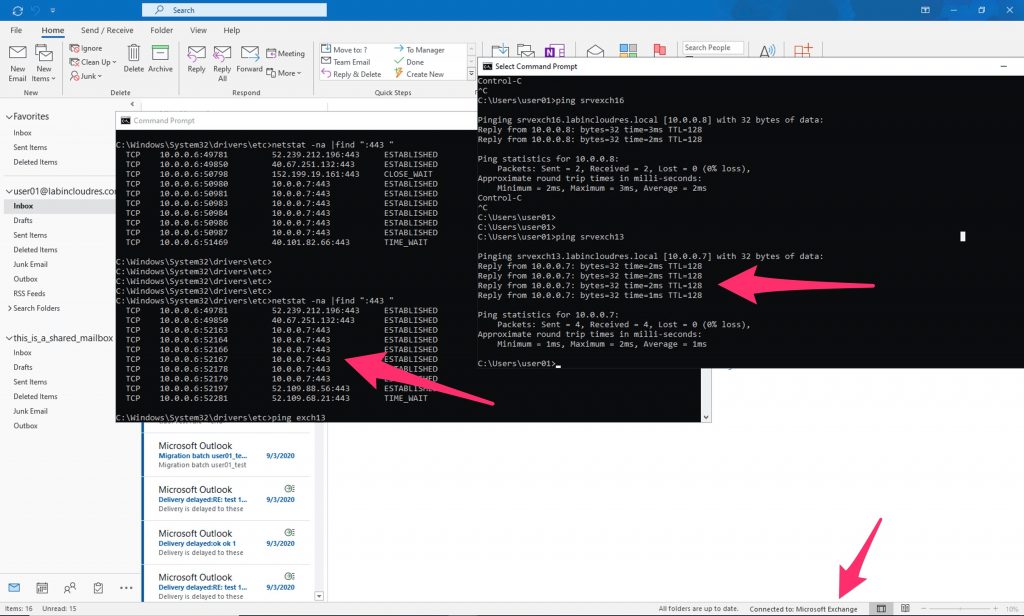
As you can see , our client resolve the mail.labincloudres.com with .0.8 and the Exchange 2013 is proxying the request to 2016 (where there are the mailboxes).
Current situation :
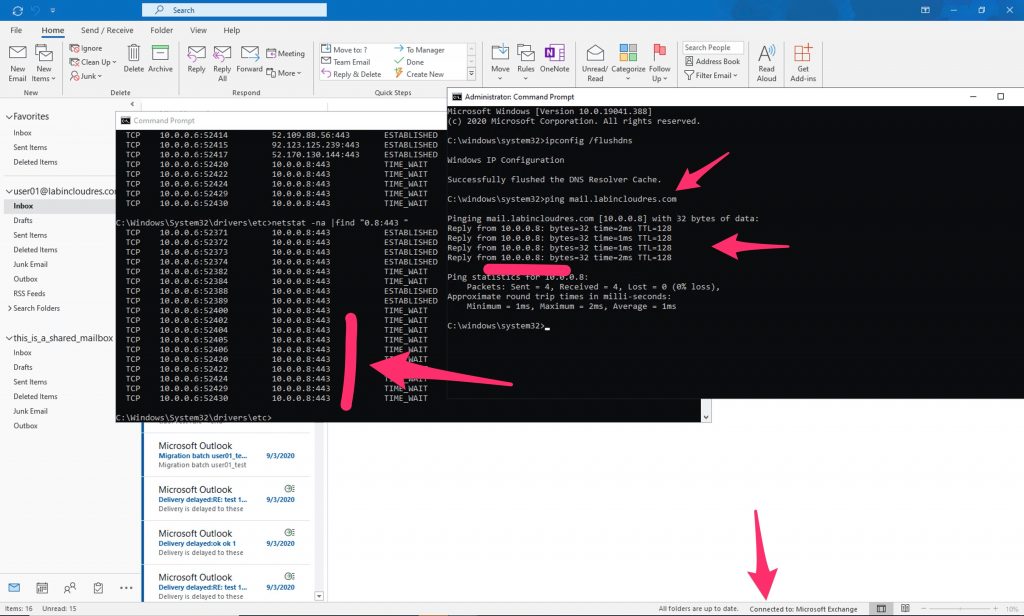
Now , after i flushed the dns cache, we are connected to Exchange 2016
Now we are almost done..
In the next guide i’ll go to decommission the Exchange 2013.