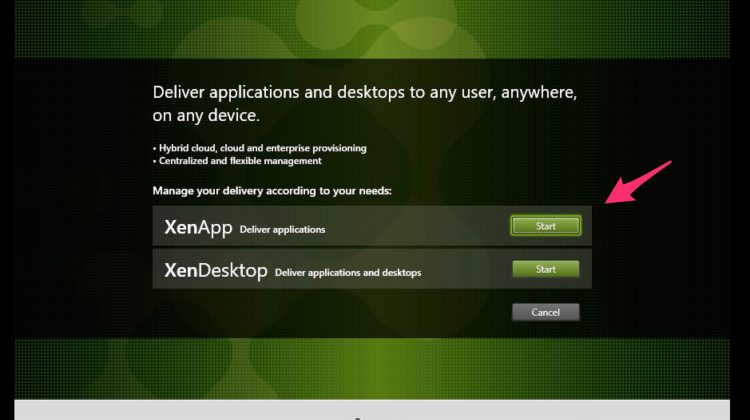
After you have install and configured you DC based on Windows 2016, connect the ISO and let’s go! Notice: you can’t install the Delivery Controller on a Dc, so, because it’s a POC, I’m going to install everything on a second Windows 2016 server joined to a domain. select “Delivery Controller” Select all Select all …
Author: Marco Schiavon
Filter ARP table on HP Switch
This is the command to show the ARP table on a HP switch. SW01-RackA# show arp IP ARP table IP Address MAC Address Type Port ————— —————– ——- —- 192.4.0.3 005056-a03e81 dynamic Trk1 192.4.0.4 005056-a063bc dynamic Trk1 192.4.0.5 005056-a05de4 dynamic Trk1 192.4.0.6 005056-a070f0 dynamic Trk1 192.4.0.10 001132-4cfd03 dynamic Trk1 192.4.0.24 000000-000000 dynamic …… …… Now, we need to filter and find a MAC-Address with these data …
How to export a PST from an Exchange 2010 with Powershell
First of all, we nee to create a share where to send our pst’s export task Credo una condivisione dove andrò a destinare i miei pst. After that i need to assign the NTFS to the group “Exchange Trusted Subsystem “ Now we need to assign the Mailbox Import Export role to Administrators group. New–ManagementRoleAssignment –Role …
How to install your Office copy if you have an Office365 with on-premises licence ?
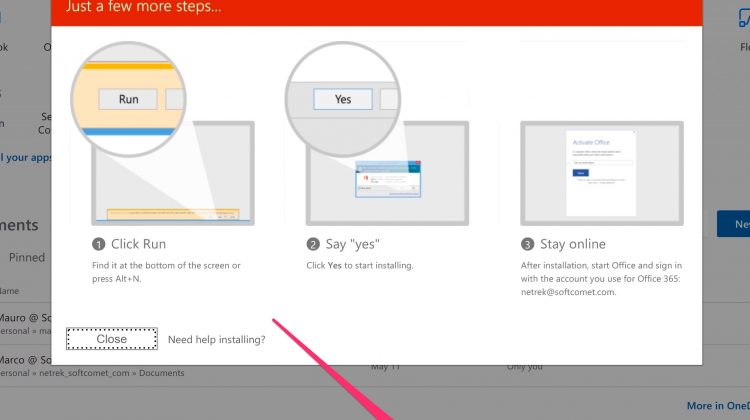
First go to your office portal https://portal.office.com ( you will be redirected to https://login.microsoftonline.com ) and login with your ID. Now click on “install Office apps” : Now select “Office 2016” : Now click “run” After this, the installation procedure starts and you just wait the download and wait the installation process ended. That’s it
Find your Exchange on-premises build / version
First of all, open your Exchange console and run this command: Get-ExchangeServer | Format-List Name, Edition, AdminDisplayVersion As you can see, your version is 14.3 with build level 123.4 Now we can go here to see what means : https://technet.microsoft.com/it-it/library/hh135098(v=exchg.150).aspx In our case, we have one “simple” SP3 . After the update, if you don’t see …
How to export a PST from your Office 365 Tenant – the GUI way .
Login to 365 tenant and go to “admin” and select “security & compliance” Exchange Select Edit and verify that these roles are selected : Case Management Compliance Search Export Hold Preview Review RMS Decrypt now go to “content search”: click “new search”: Select 1, then 2 to find a specific mailbox to export. Type the …
Come assegnare le licenze Office 365 da Powershell
Dopo essersi collegati al tenant, (vedere la guida Come collegarsi al Tenant 365 con Powershell? ) eseguiamo i seguenti comandi: facciamo una lista delle licenze a nostra disposizione: Get-MsolAccountSku listiamo ora gli utenti che non hanno licenze assegnate.. Get-MsolUser -All -UnlicensedUsersOnly Assegnamo, per esempio, a sixx una licenza di tipo EXCHANGESTANDARD: Attenzione che è necessario passare …
Come preparare il CSV di import PST per il 365?
Ipotizziamo di aver già esportato i nostri PST ed averli posizionati sul nostro percorso locale K:\PST, procediamo ora alla preparazione del CSV ed il caricamento con azCopy.exe . Posizioniamo un file PST per eseguire il test e, nel nostro caso, è il seguente: sicur33.pst Attenzione che il comando azCopy legge i dati di origine da una …
Come collegarsi al Tenant 365 con Powershell?
Set-ExecutionPolicy RemoteSigned per precaricare le credenziali di accesso : $Cred = Get-Credential $Session = New-PSSession -ConfigurationName Microsoft.Exchange -ConnectionUri https://ps.outlook.com/powershell -Credential $Cred -Authentication Basic -AllowRedirection Per connettersi ad Azure: Connect-MSOLService -Credential $Cred Eseguire dopo : Import-PSSession $Session Al prompt, inseriamo l’id e password di accesso al tenant. a questo punto dobbiamo importarci i comandi.. Import-PSSession $Session
Come settare il “locale” nel nostro Office365 tenant?
Dopo essersi collegati al tenant, (vedere la guida Come collegarsi al Tenant 365 con Powershell? ) eseguiamo i seguenti comandi: Settiamo la lingua preferita: MsolUser -UserPrincipalName sic3@miodominio.it | Set-MsolUser -PreferredLanguage “it-it” Ora il “Locale”: MsolUser -UserPrincipalName sic3@miodominio.it | Set-MsolUser –UsageLocation IT Attenzione! Per il parametro -UsageLocation xx ,trovate la lista nel sito ISO : https://www.iso.org/obp/ui/#search Ed infine …

